KEEPKEY – REVIEW & USER GUIDE
A hardware wallet with limited options and coin support but a very simple user experience that is great for beginners
KeepKey is a hardware wallet with support for several major crypto assets in a sizeable but well-built device that makes storing crypto straightforward for beginners (though it lacks a few more advanced options for experienced users).
The device retails for $144 ($129 USD + $15 shipping), which is the highest price among the wallets reviewed but still provides good value for the price given its solid design and ease of use.
Features
- Large LED screen with single button for PIN entry and transaction confirmation
- Chrome browser extension to manage and transact on multiple accounts
- Ability to transfer between supported crypto assets directly on the device
KEEPKEY REVIEW
Pros
- Solidly built with good hardware design
- Shapeshift integration for exchanging assets on device
- Easy to use
Cons
- Larger, less portable than comparable devices
- Limited crypto asset support
- Lack of options to control transactions fees
- Higher price than competitors
* This link directs you to Amazon as it provides the most options for purchasing this wallet. However, it is important to note that when purchasing a hardware wallet through a third party retailer or vendor to always ensure that the wallet once received has not been tampered with as this could compromise its security and thus the cryptocurrency you will store on it. Each wallet manufacturer typically has tamper resistant packaging or other hardware/software mechanisms to prevent tampering but they are not foolproof. Please only purchase hardware wallets from trusted vendors.
BUILD QUALITY & DURABILITY
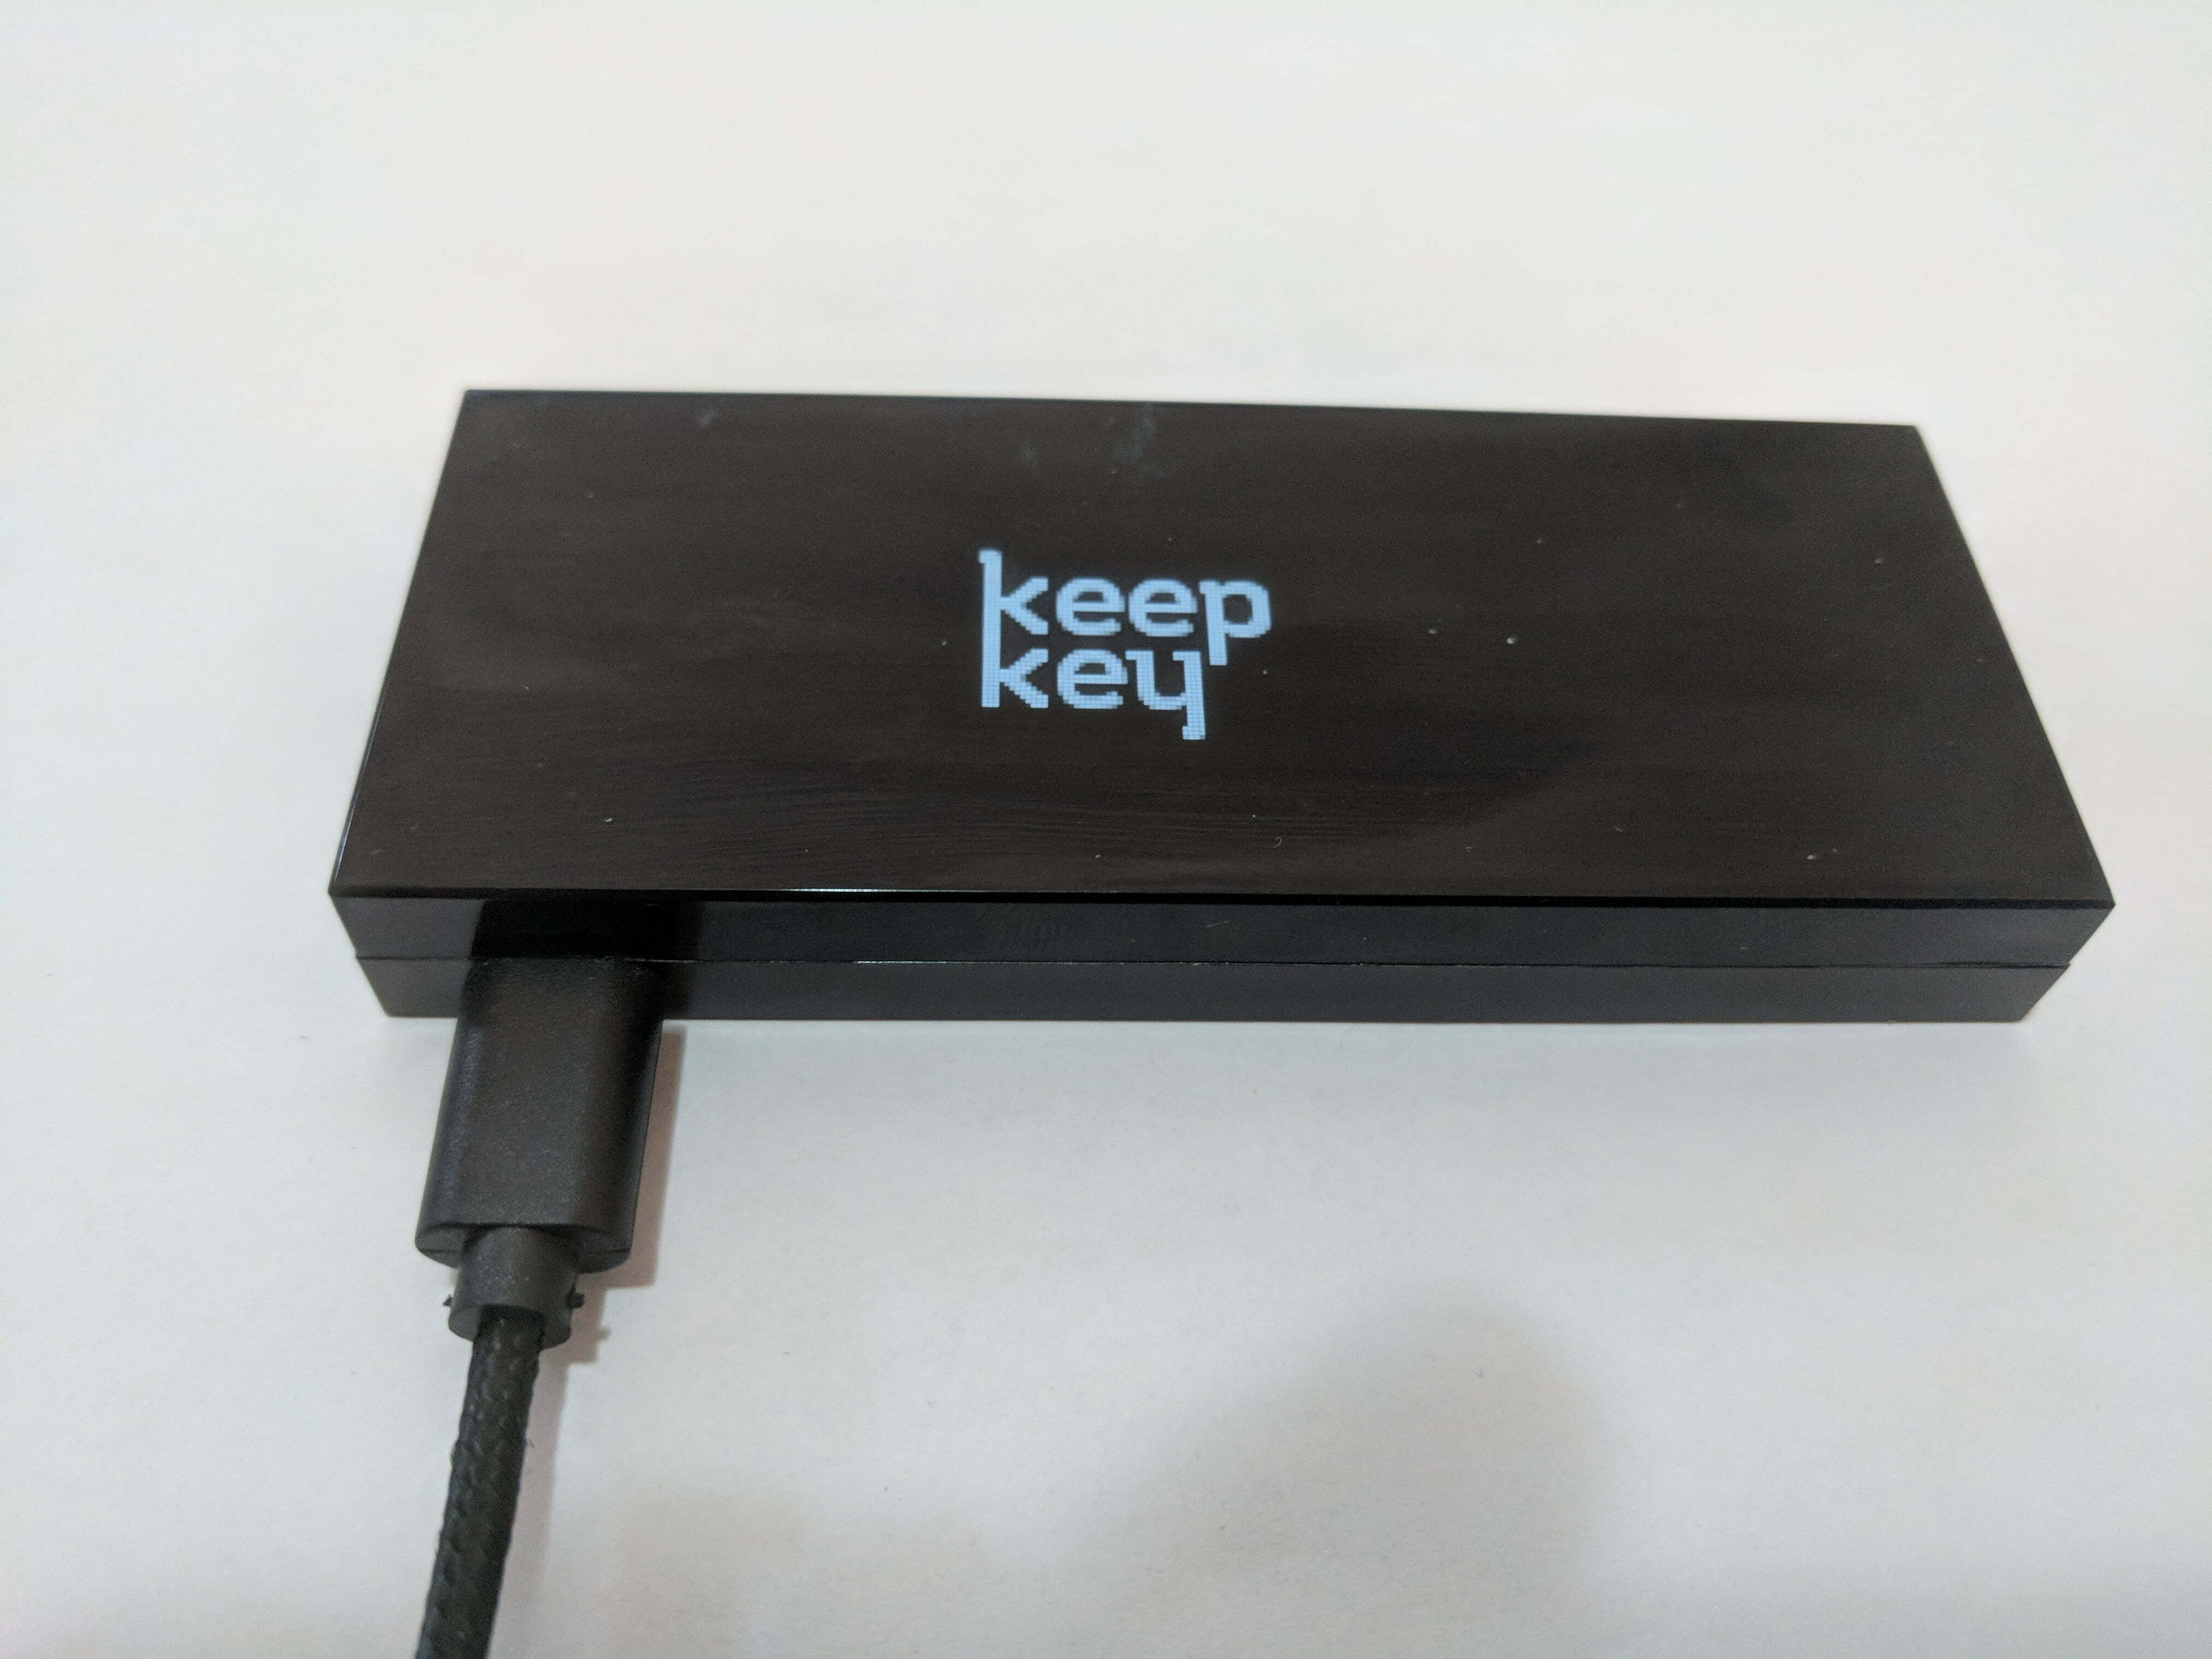
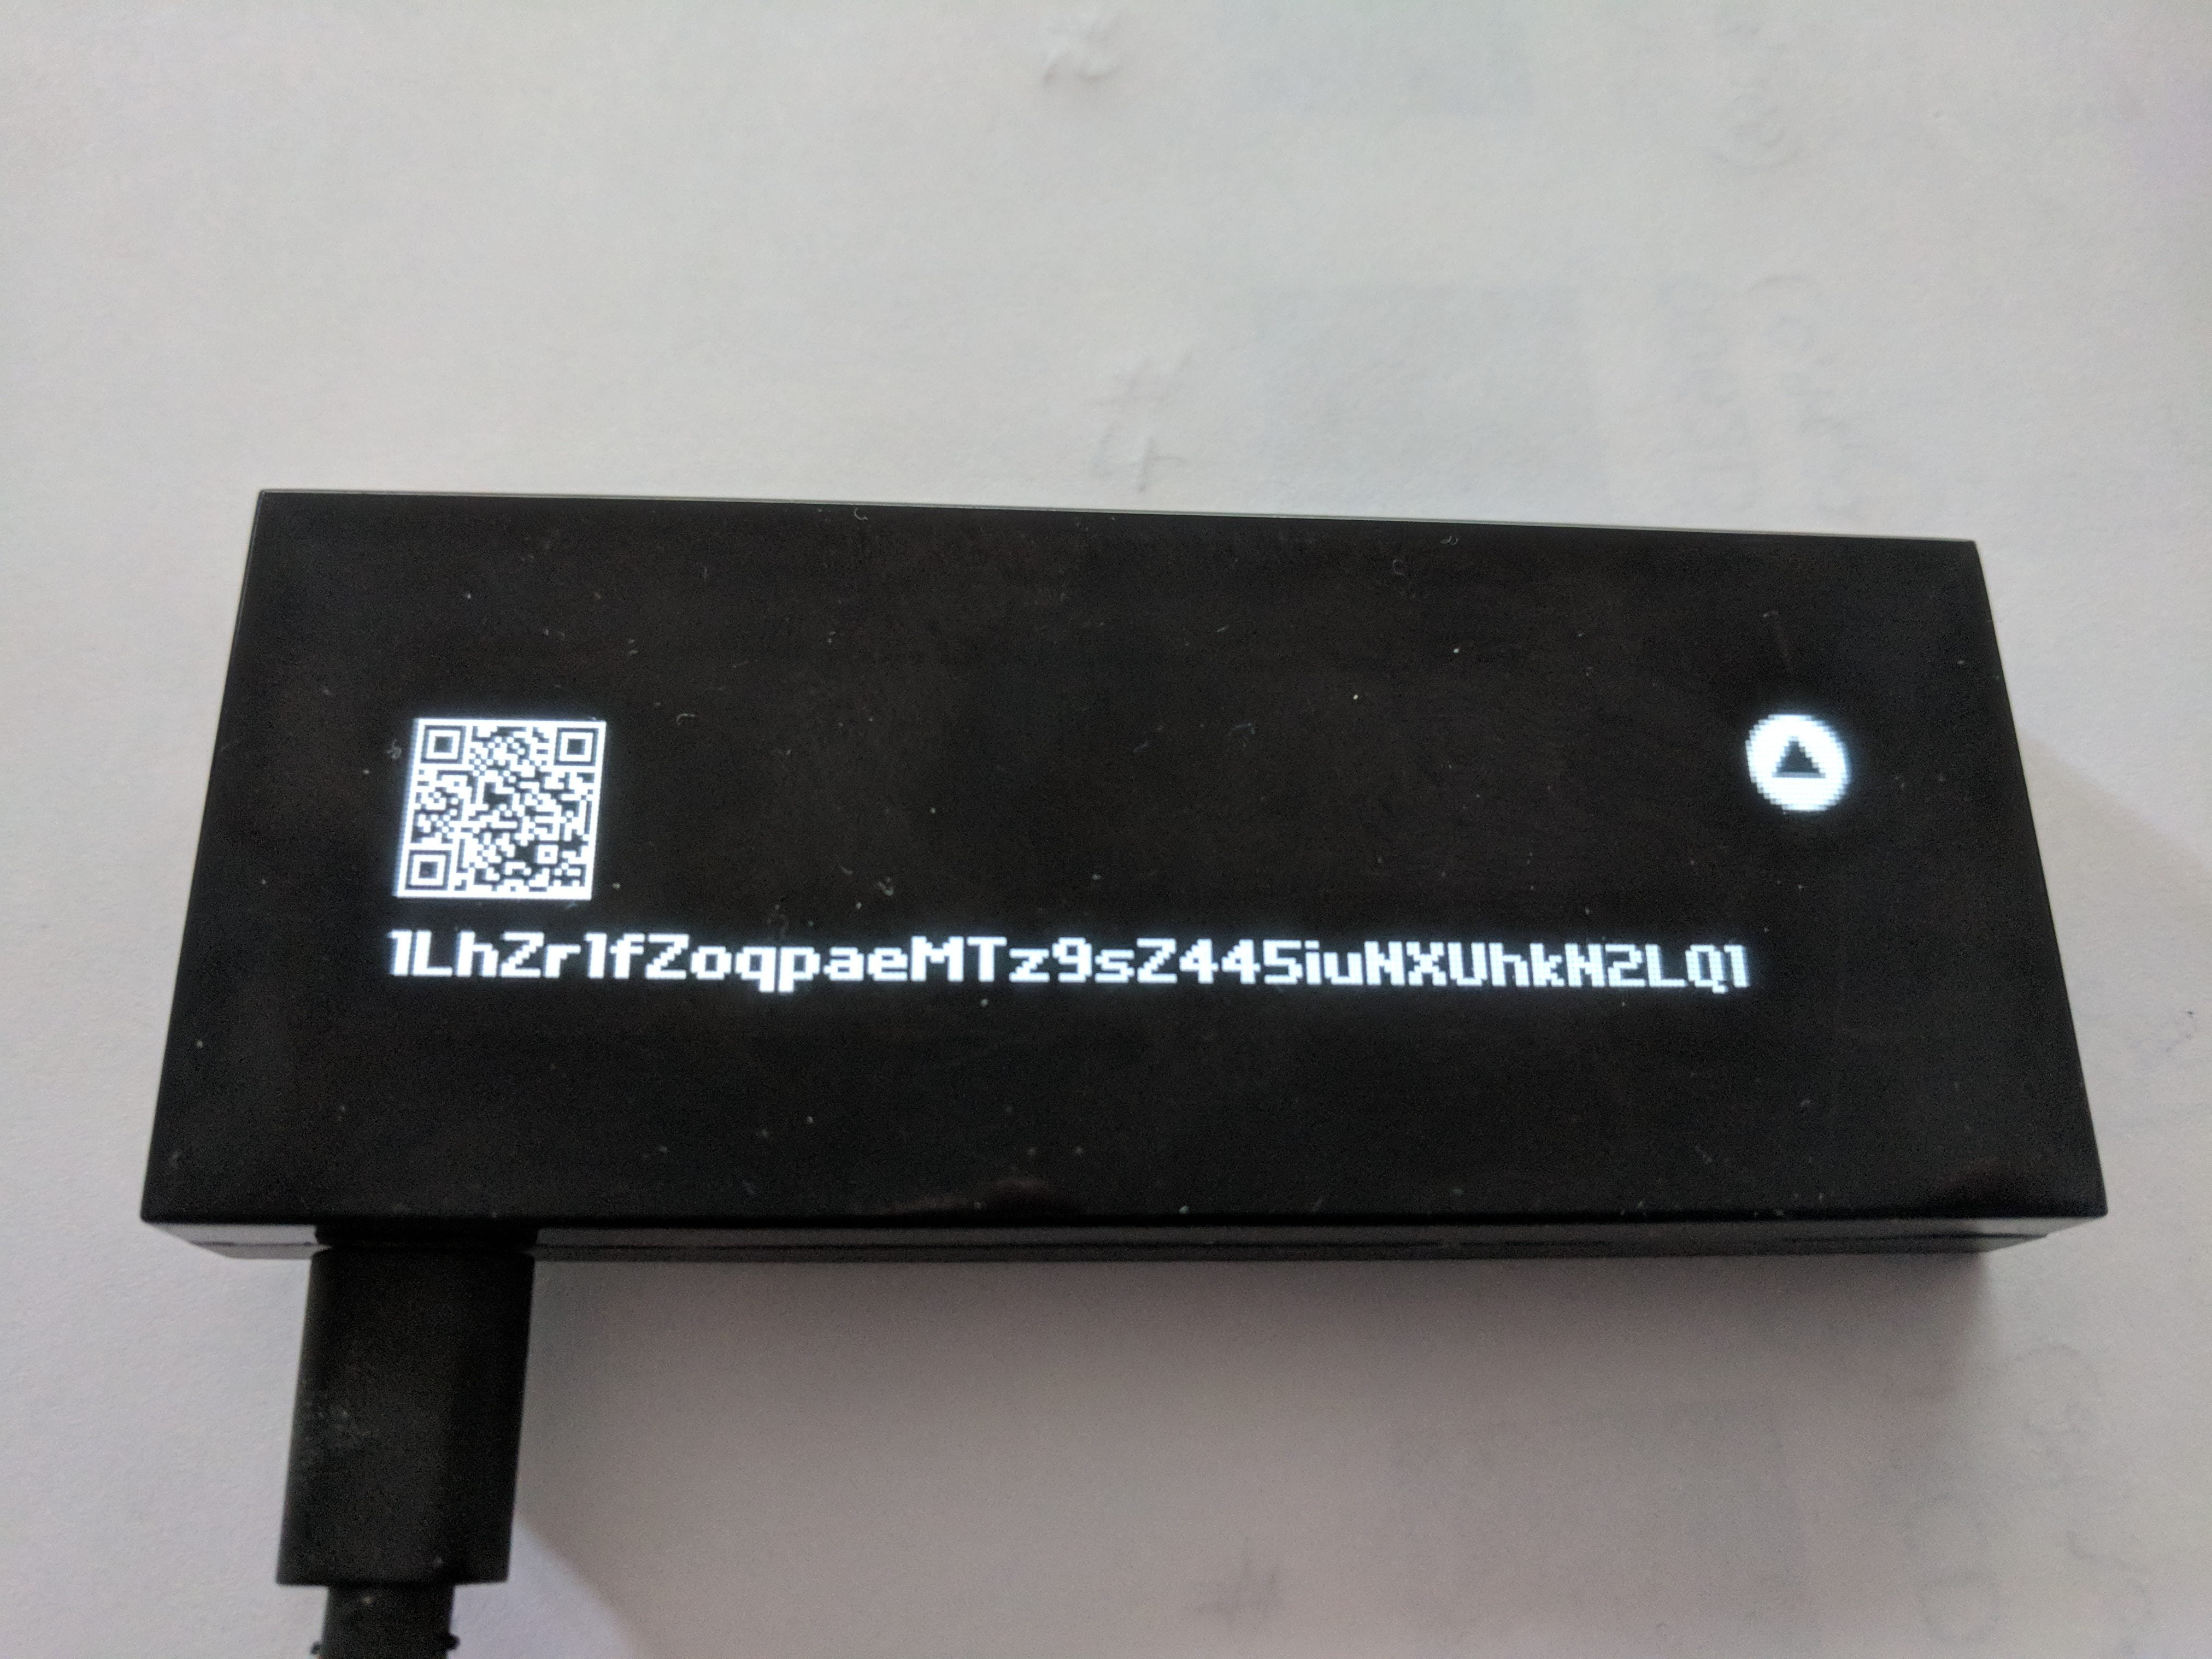
The KeepKey has a polished and solid design that feels very sturdy, if a little large. The large LED screen provides plenty of real estate to display transaction confirmations in easily readable text along with QR codes.
The single button used for confirming transactions also has a solid feel and is located in a convenient place so as not to obscure the screen, making it well-suited for its intended purpose.
The anodized aluminum case and polycarbonate front give it a sleek look but may also be prone to scratches or dents if dropped from a height. The LED screen does attract fingerprints quite readily but not so much as to obscure the visibility of the screen in any way.
Although not quite as portable as some other hardware wallets in that it can’t be attached to a keychain (ironic given its name), the KeepKey can readily be taken along in a laptop bag or stored in the home or a safety deposit box.
SETUP PROCESS
Setting up the KeepKey was very straightforward and at no point were any of the steps confusing or complicated. Making sure that the recovery sentence is properly recorded is the most important step of the process and having a spare copy of the recovery sentence card would be helpful in case a mistake is made when transcribing.
EASE OF USE & SECURITY
Using the KeepKey for managing and sending and receiving crypto assets was an area where the hardware wallet really stood out. Using the KeepKey Client App allowed for easy management of accounts across multiple crypto assets. Sending and receiving those crypto assets was also straightforward and simple, providing the user with visibility into the fees involved.
The one area where KeepKey could improve upon is to provide users with a means to control transaction fees for sending crypto — although they affect the expediency of the transaction, it's a feature most other wallets support. The functionality to transfer crypto assets using Shapeshift integration without leaving the application saves several steps for most users and provides transparency into the fees involved.
The KeepKey is also one of the most secure hardware wallets. PIN confirmation utilizes a hardware-based random number generator to determine the placement of the numbers on the device screen, which helps ensure that even if a user's computer is compromised the crypto assets on the device are secure.
The KeepKey functions without an operating system, eliminating any threat of malware or viruses infecting the device itself. The device also offers an optional feature to enable a passphrase that acts as a 13th word of the recovery sentence and will create 'hidden wallets' that can only be accessed with that passphrase and the PIN. Note that the passphrase option is only recommended for experienced users as it cannot be recovered or reset so it's important to not forget the passphrase if the option is enabled.
SUPPORTED COINS
Namecoin and Testnet are also listed as supported on KeepKey’s website but instructions on how to utilize those coins with the device could not be found.
Also, although Ethereum is supported, only ETH is supported and there's no support for ERC20 tokens or ETC being stored on the device at this time.
One advantageous feature of the KeepKey is that the supported coins can be exchanged using Shapeshift from within the wallet software by sending coins from an account of one coin type to another (see sending BTC/ETH section below).
As is standard in the hardware wallet segment, the company states there are plans to add support for additional coins in the future.
HELP & CUSTOMER SUPPORT
KeepKey has a simple and complete help site. The help materials cover most questions typical users have and is well laid out with different categories for different topics. A handy search function at the top of the page also helps users find the answers they're looking for.
There's also a link on the help site to fill out a support query if users can’t find an answer within the other materials. After submitting a simple support request to KeepKey an automated response came within 5 minutes indicating that a ticket had been created and a personal response would be provided within 2 business days. A personal response was actually sent about 2 hours after the initial support request that provided a generic answer to the question. A follow-up sent to the support team requesting clarification has yet to be answered a week later as of the time of publishing of this article.
TOTAL SCORE
Overall, KeepKey offers all the features needed for novice users in a well-built device that's easy to use. The slightly large design makes the device less portable than others in the hardware wallet category, but the solid feel and nice-looking package helps to make up for the size. Although the support for crypto assets is limited to certain coins, the useability of the device benefits from the easy exchange of those tokens using the Shapeshift integration. Though the device sells on the high end at $144 ($129 USD + $15 shipping), it delivers good value for the money.
* This link directs you to Amazon as it provides the most options for purchasing this wallet. However, it is important to note that when purchasing a hardware wallet through a third party retailer or vendor to always ensure that the wallet once received has not been tampered with as this could compromise its security and thus the cryptocurrency you will store on it. Each wallet manufacturer typically has tamper resistant packaging or other hardware/software mechanisms to prevent tampering but they are not foolproof. Please only purchase hardware wallets from trusted vendors.
KEEPKEY – USER GUIDE
Want to know how to use KeepKey? This step-by-step user guide gives you all the details to transferring crypto, setting up, backing up and recovering the device
1. SETTING UP DEVICE
Setting up the KeepKey was very simple starting with going to the setup page (NOTE: Use the Chrome browser to go through the steps since the Client App is only available as a Chrome App).
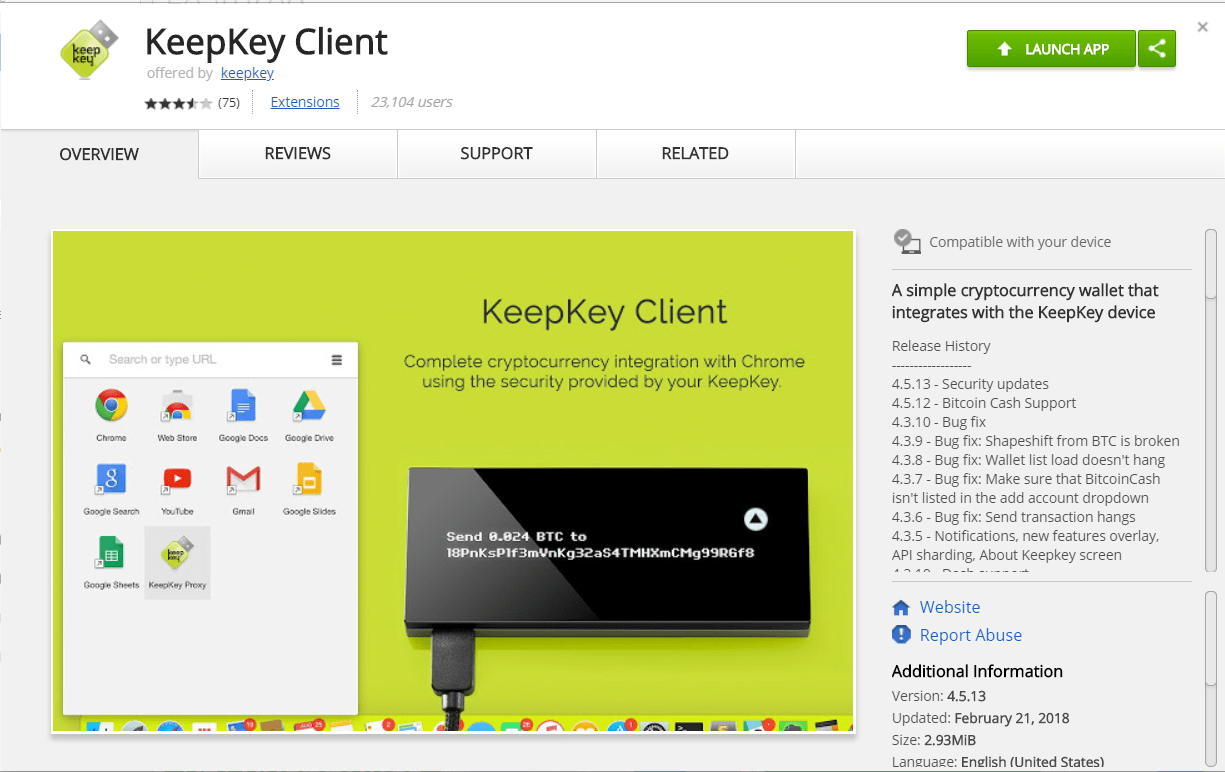
- Download and install the KeepKey client app from the link provided on the site then launch the application after installation.
- Connect the KeepKey to a USB port using the provided cable.
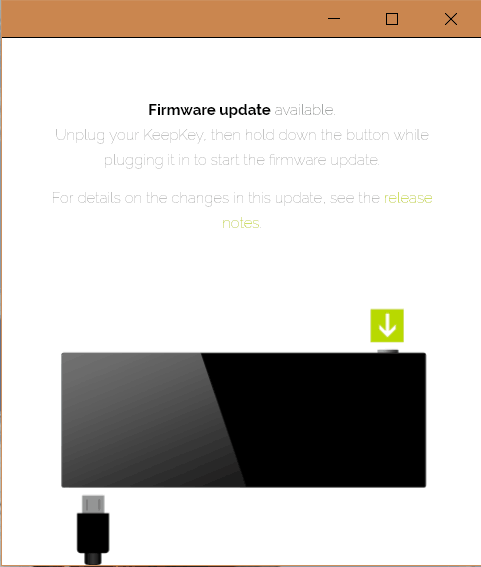
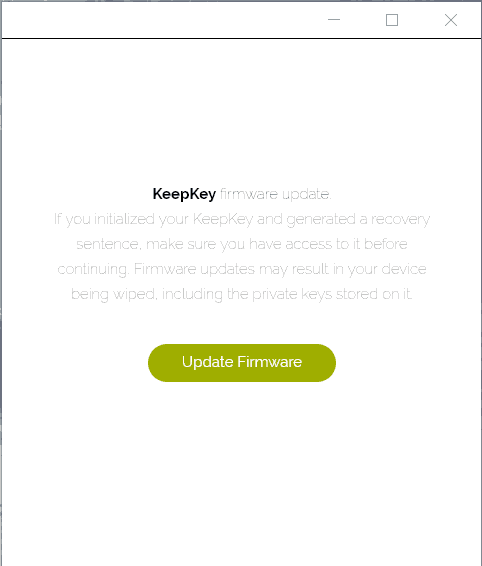
- If a firmware upgrade is required, follow the steps in the application which will require unplugging the device and holding down the button on the device when plugging it back in.
- Initialize the device by giving it a label to identify its purpose for the user.
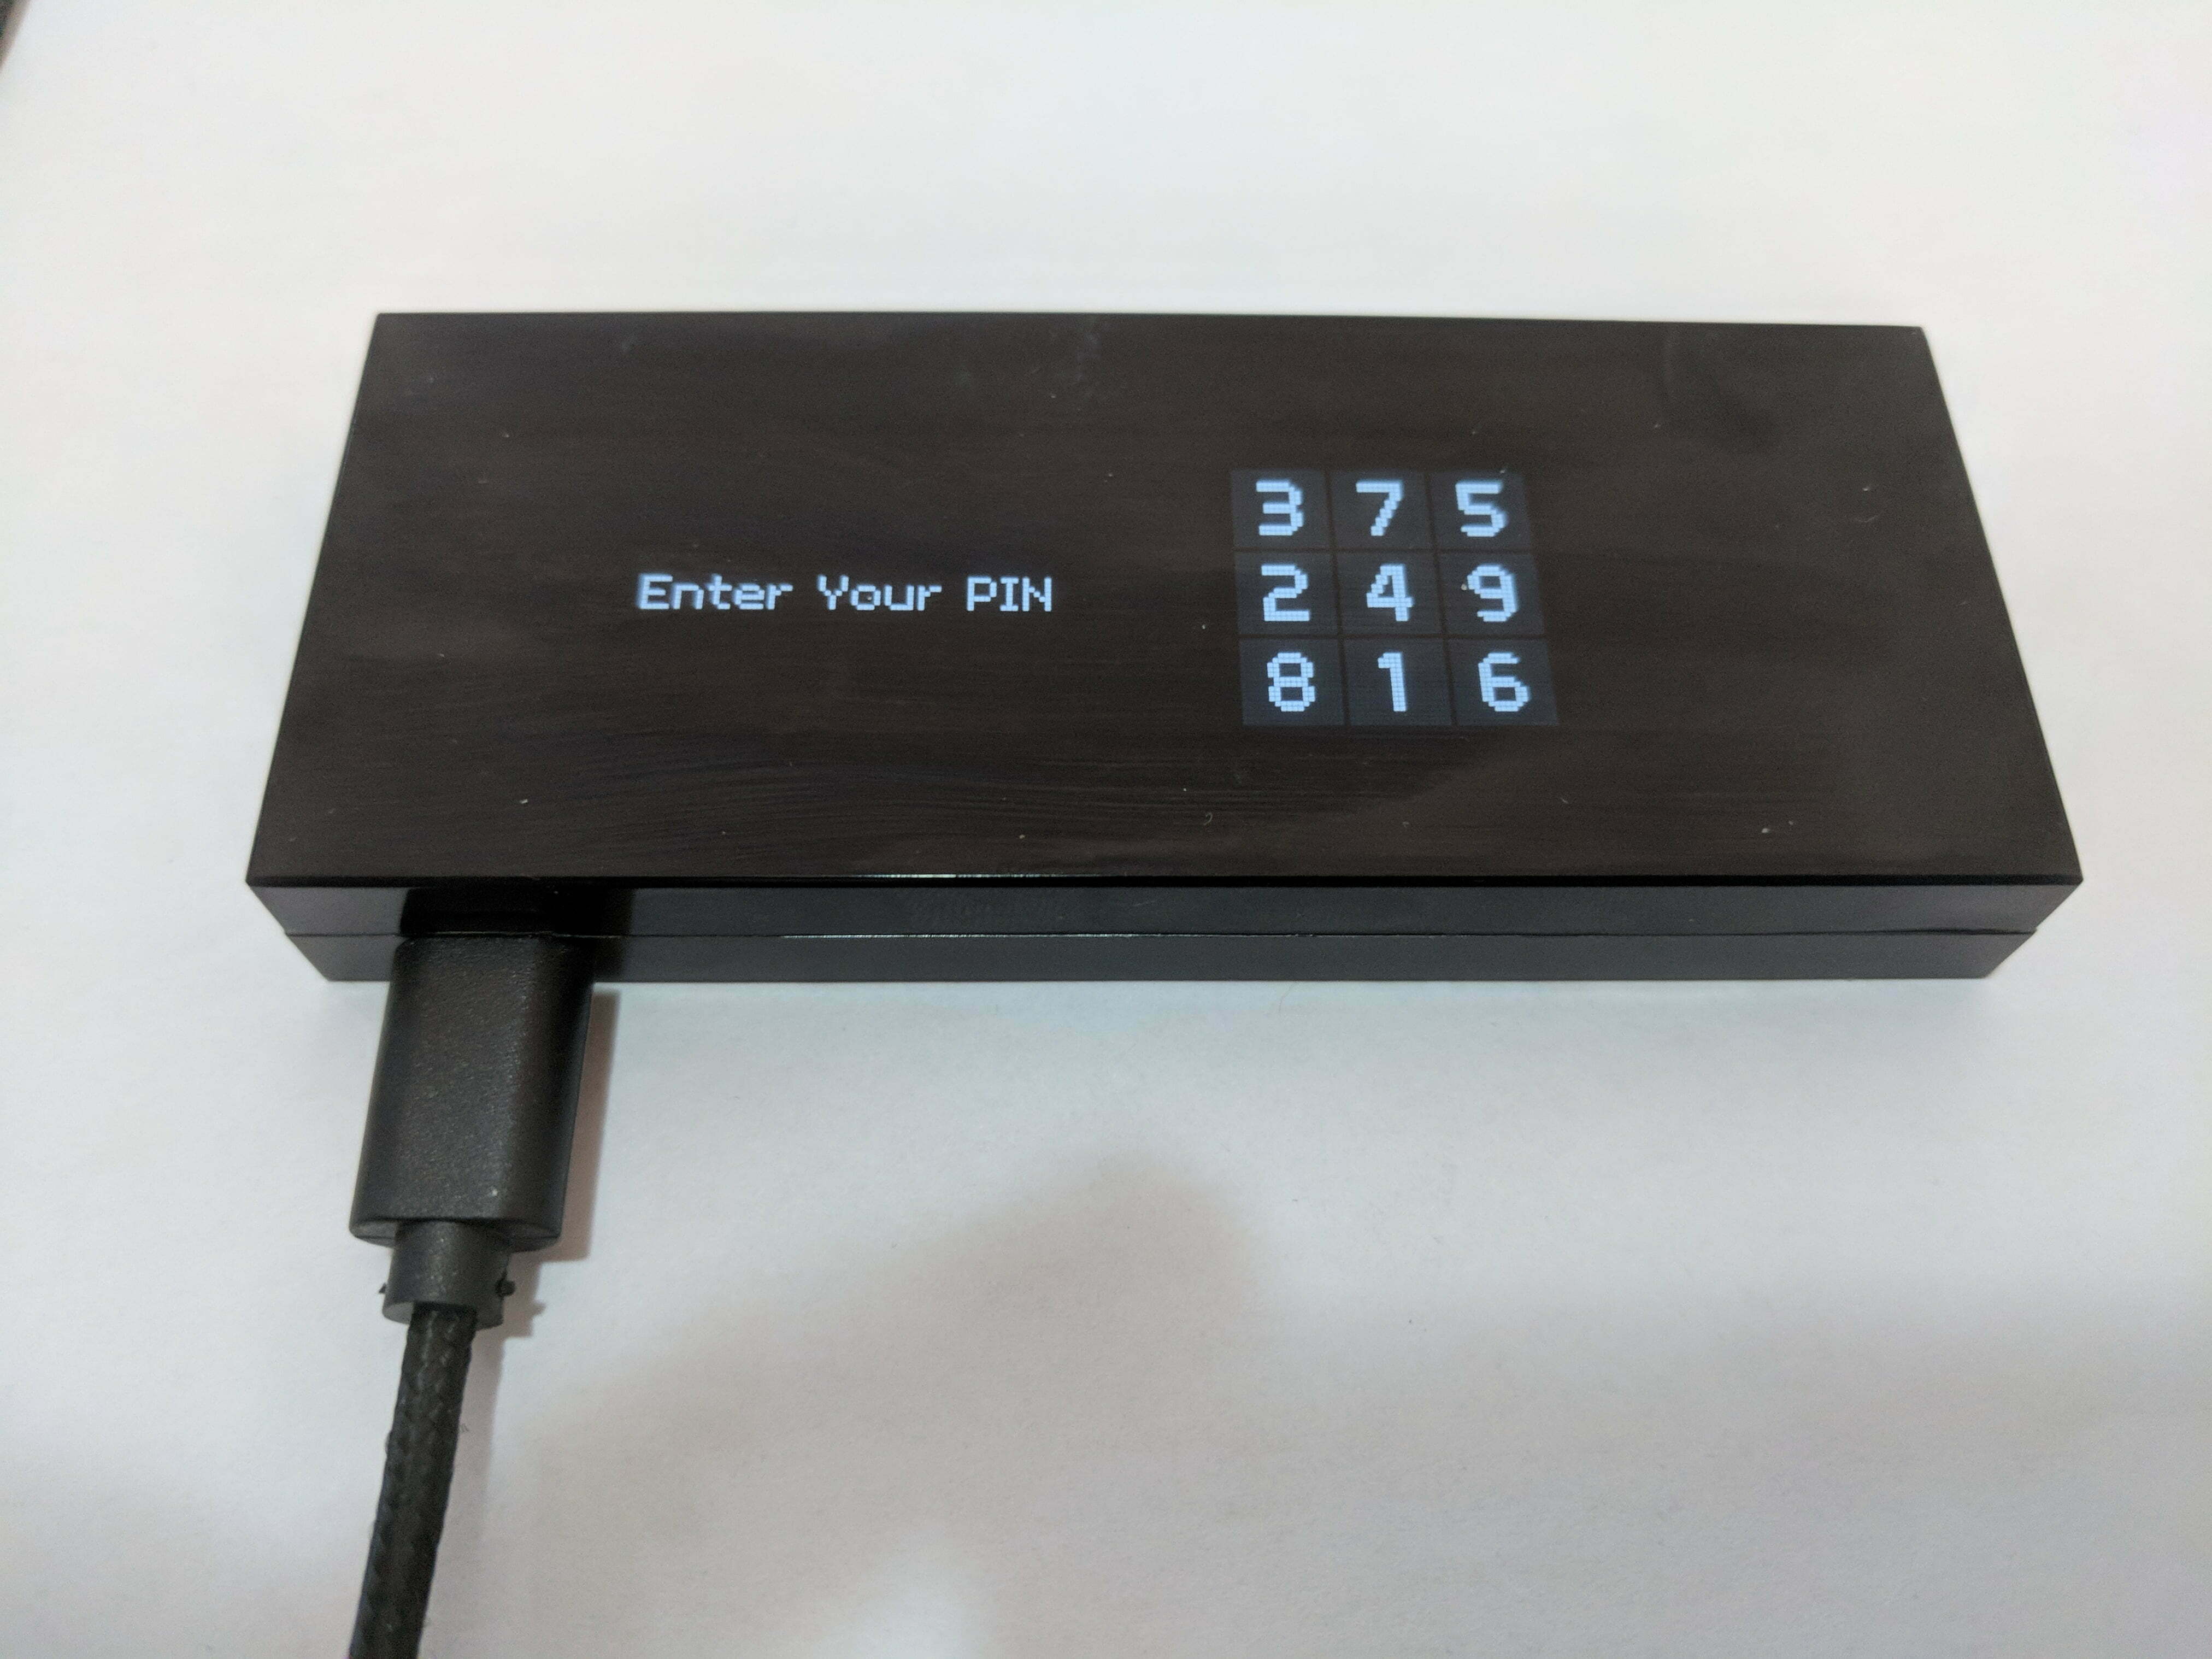
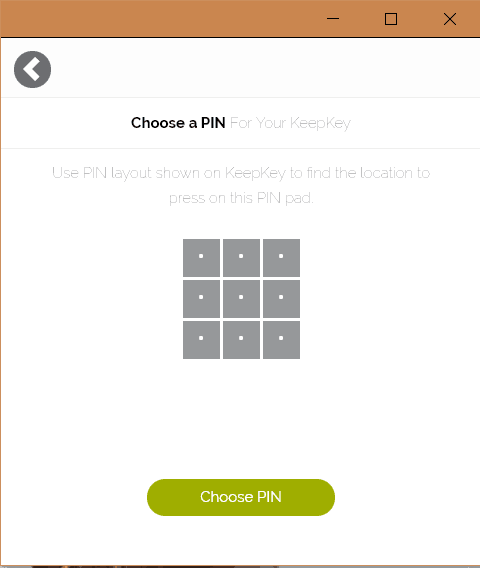
- Choose a 1-9 digit PIN for the device (6+ digits recommended); this is done by looking at the screen on the device showing numbers in a randomized order and then clicking the position of the number in the Client App.
- Re-enter the PIN to confirm the value noting that the placement of the numbers on the device will have changed.
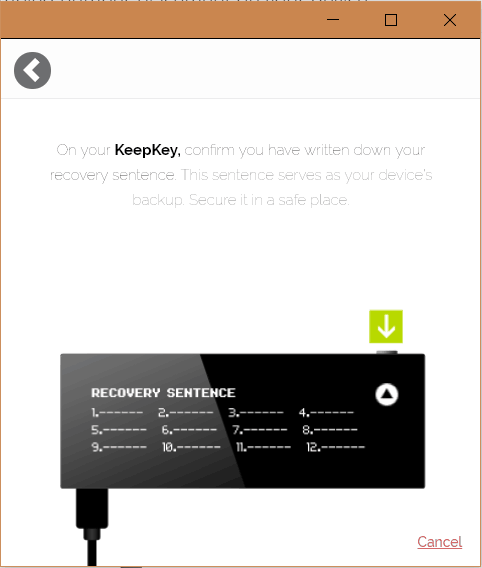
- When the 12-word recover sentence is displayed on the device be sure to write down the 12 words onto the provided card.
- Double and triple check each word in the recovery sentence being sure to check spelling as this is the only means to recover wallets on the device if it's lost or stolen and will only be displayed once.
- Once the recovery sentence has been written and checked press the button on the device to confirm and complete the initialization.
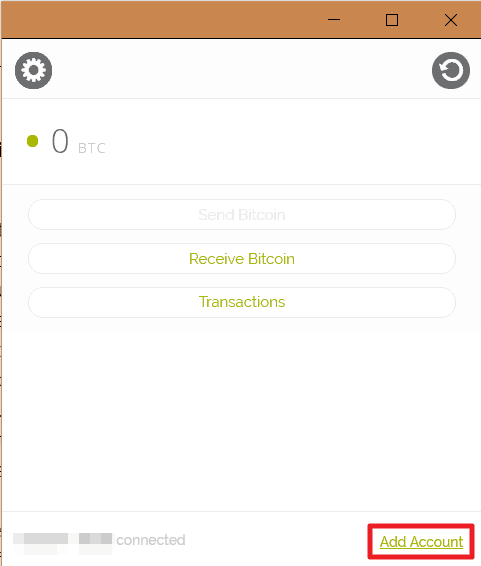
- By default a Bitcoin (BTC) account will have been installed on the device and it can be used to receive coins immediately.
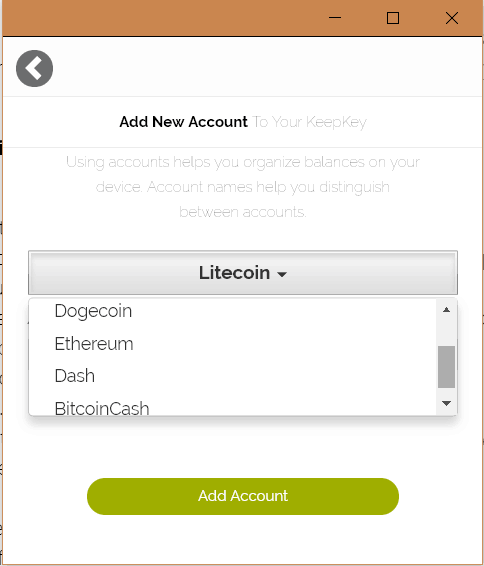
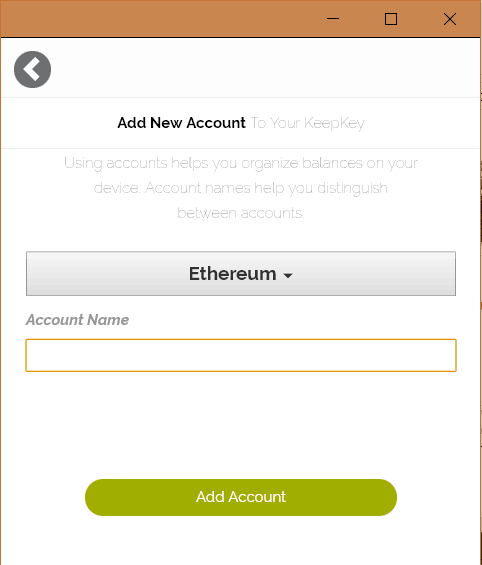
- To add additional accounts (Bitcoin or other supported coins) select the 'Add Account' link at the bottom-right of the application and select the desired crypto asset and give the account a name then select 'Add Account'.
2. RECEIVING COINS
Receiving Bitcoin
Receiving Bitcoin (BTC) on the KeepKey is done through the Client App:
- Plug the device into a USB slot.
- Open the KeepKey Client App and unlock the KeepKey by entering in the PIN.
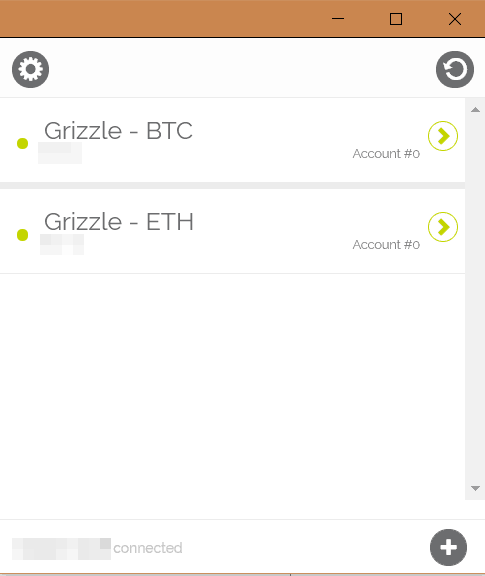
- Select a Bitcoin account to receive the BTC or create a new account by clicking on the '+' at the bottom-right.
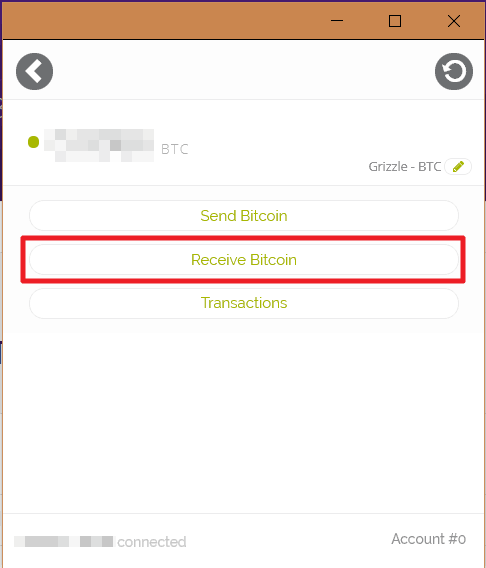
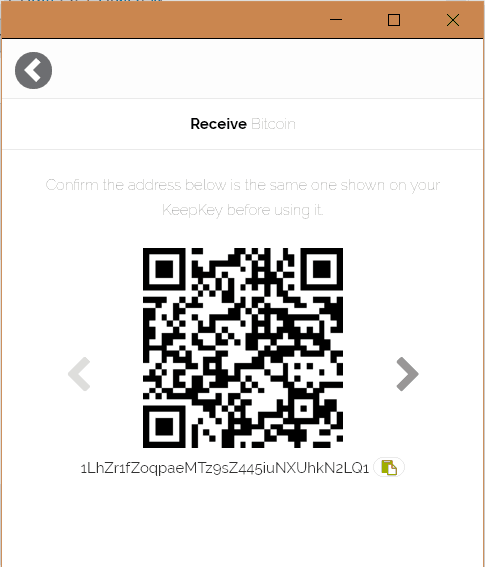
- Select the 'Receive Bitcoin' button.
- Verify the address shown on the app is the same as is shown on the device.
- Copy the address or capture the QR code and provide that to the sender.
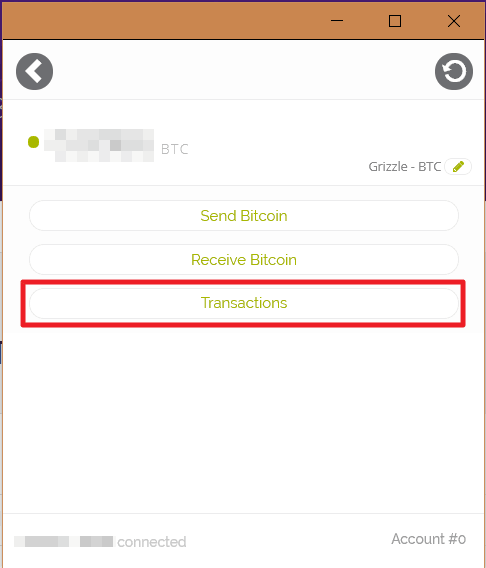
- Once the BTC has been sent, the transaction information can be seen by selecting the 'Transactions' button.
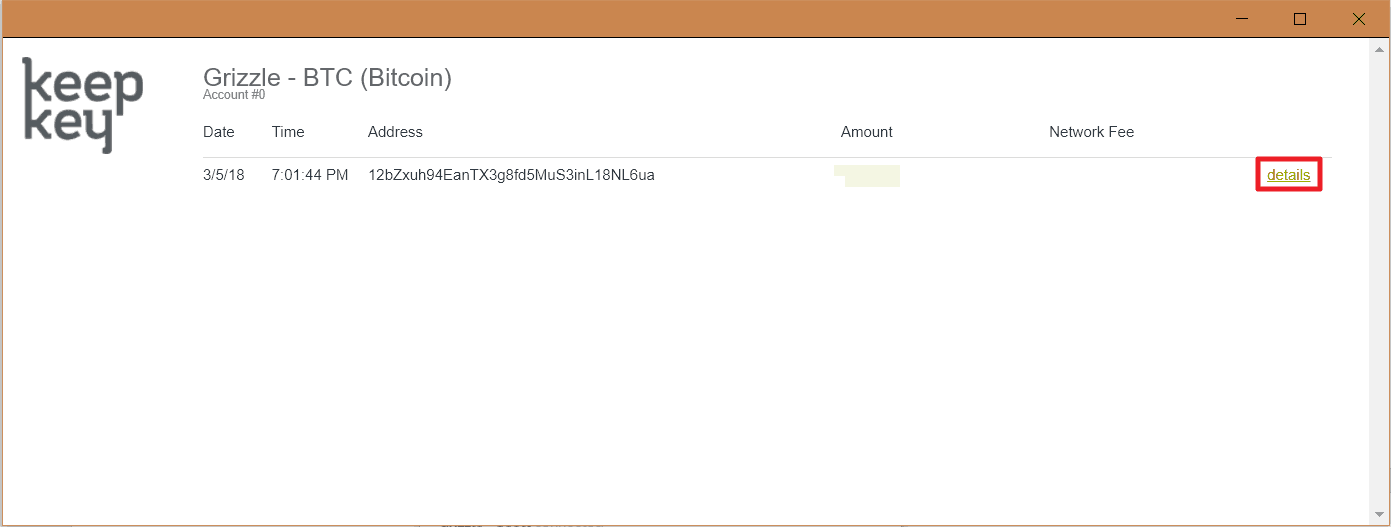
- Details of the transaction can be viewed by selecting the 'Details' link, which will open up the transaction in the BlockCypher block explorer.
- It's recommended that the details be checked to ensure that BlockCypher shows “6+” confirmations before using the BTC for anything else.
Receiving Ethereum
Receiving Ethereum (ETH) on the KeepKey is done through the Client App:
- Plug the device into a USB slot.
- Open the KeepKey Client App and unlock the KeepKey by entering the PIN.
- Select an Ethereum account to receive the ETH or create a new account by clicking the '+' at the bottom-right.
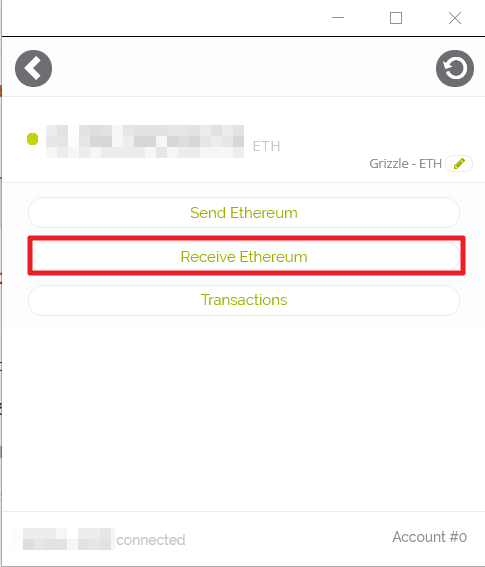
- Select the 'Receive Ethereum' button.
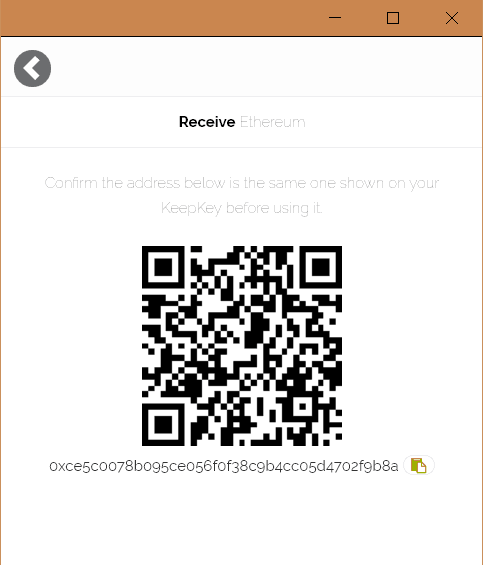
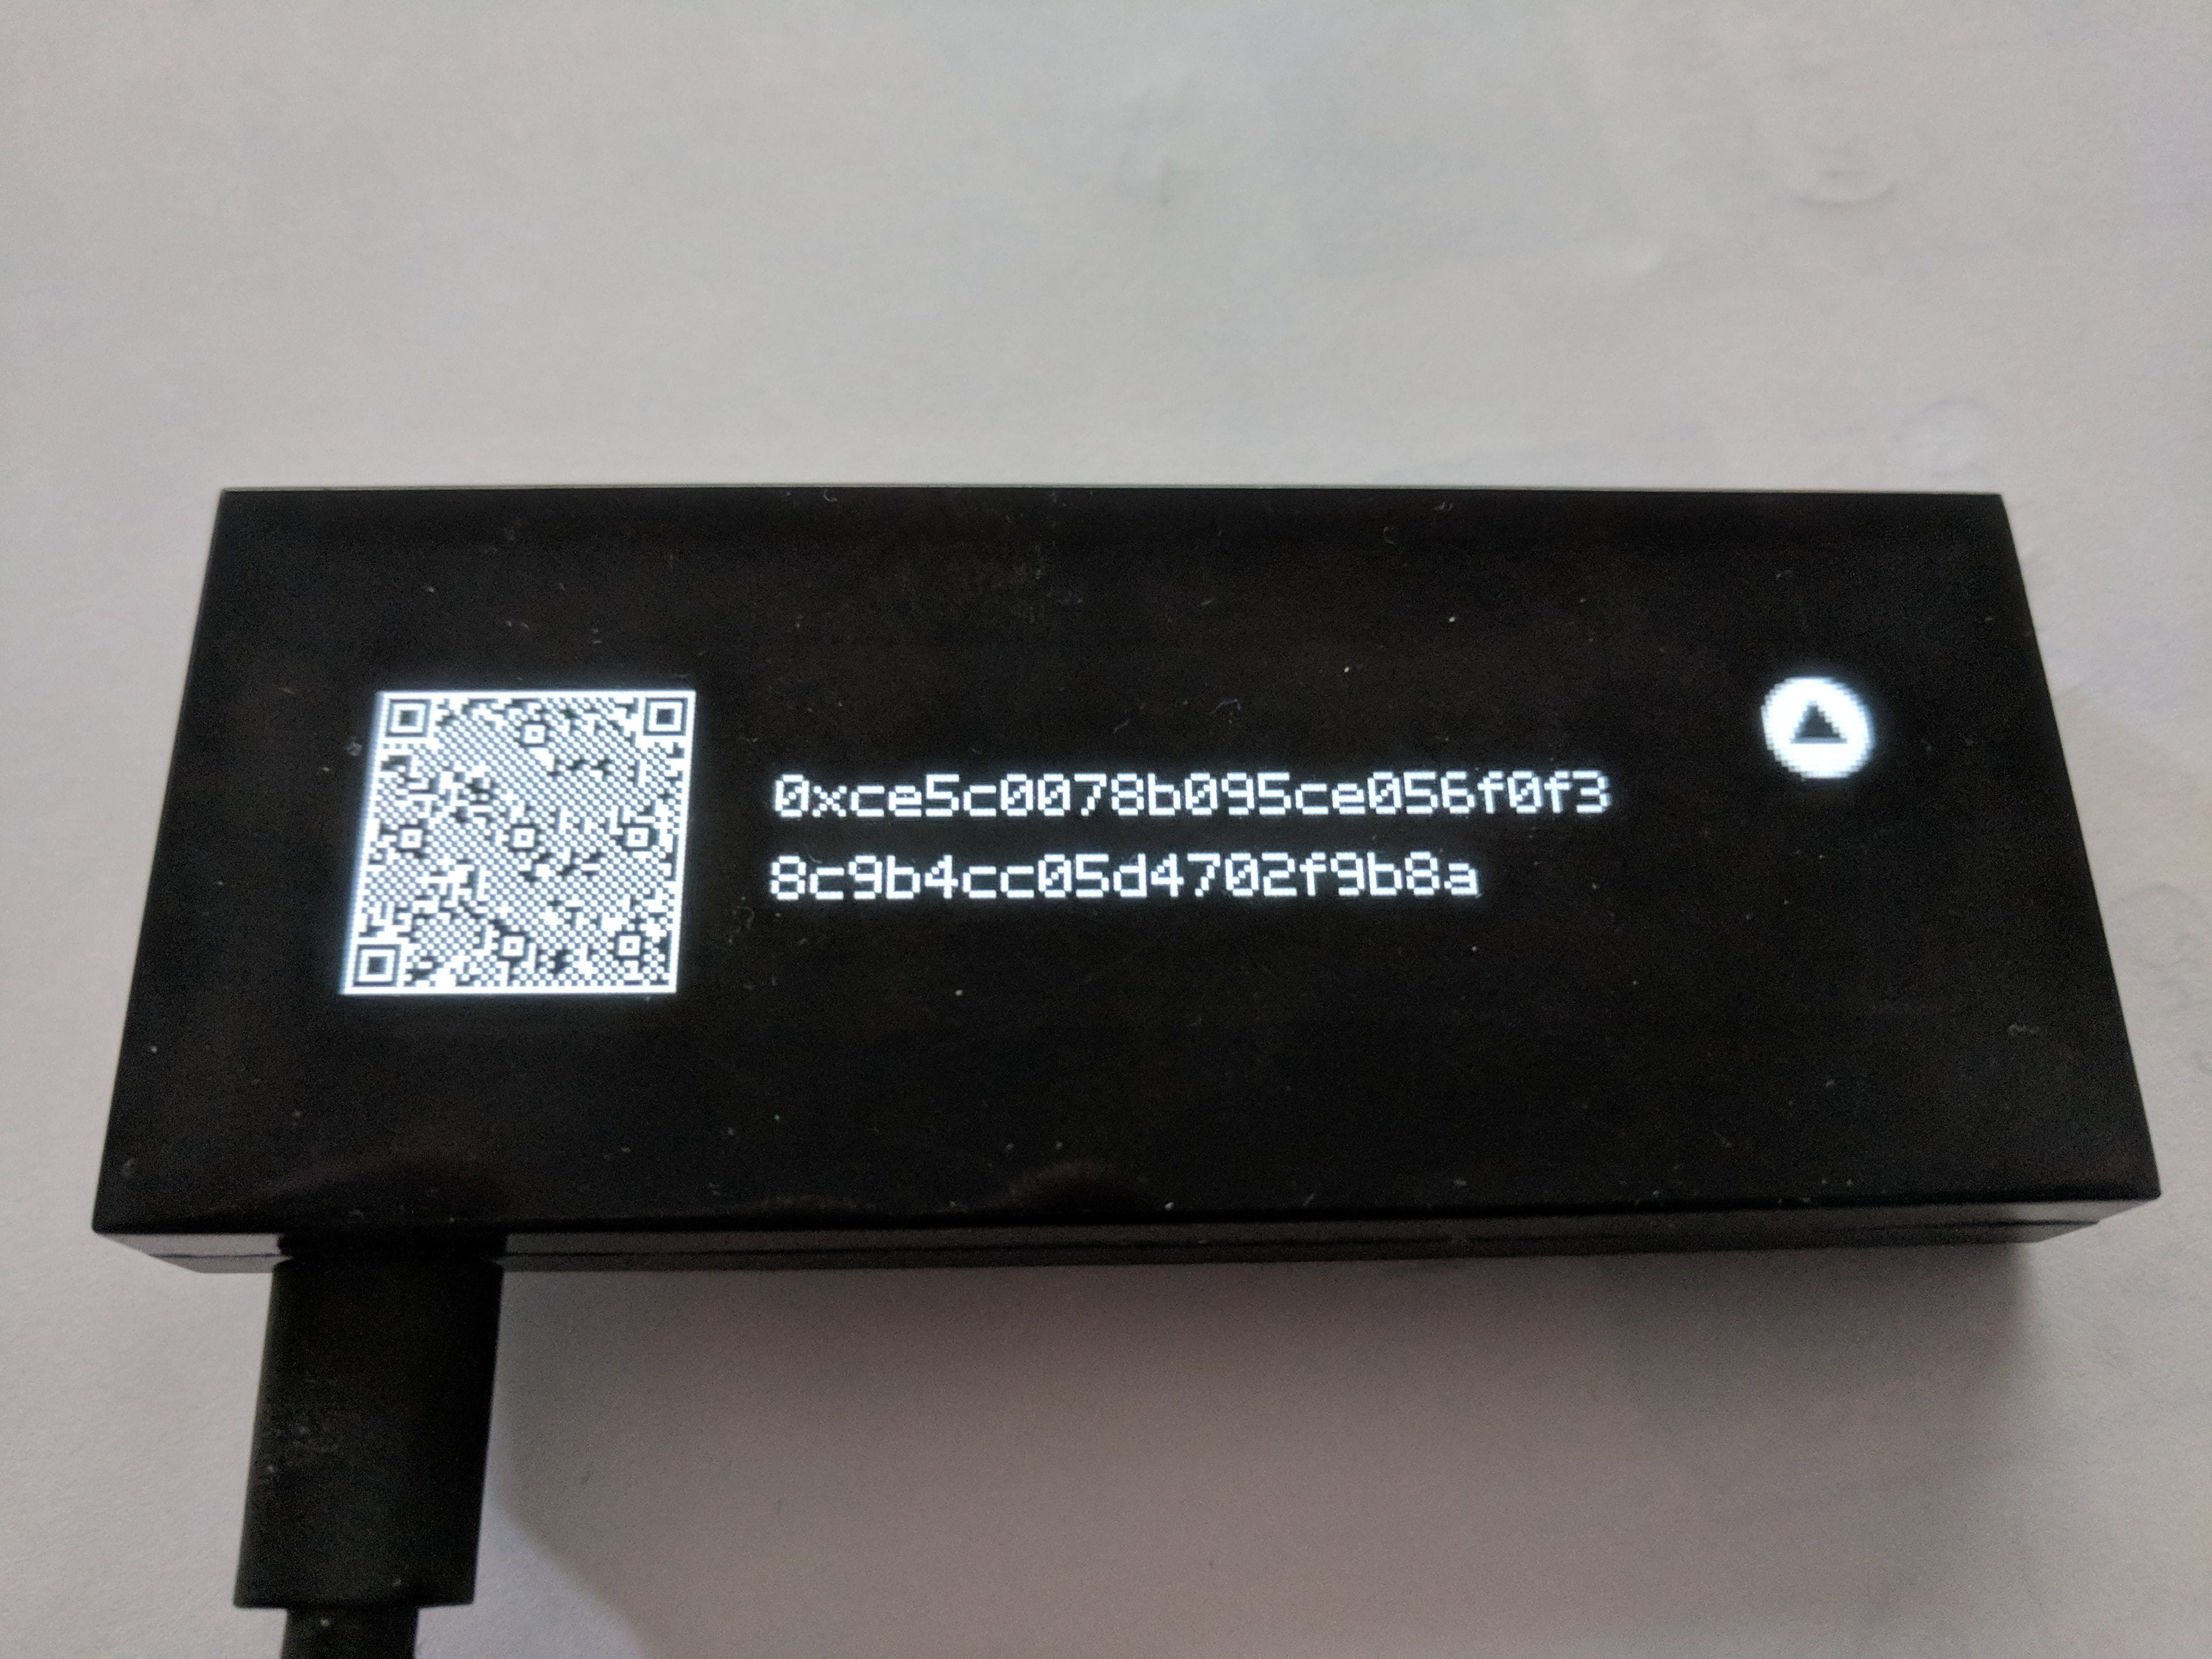
- Verify the address shown on the app is the same as is shown on the device.
- Copy the address or capture the QR code and provide that to the sender.
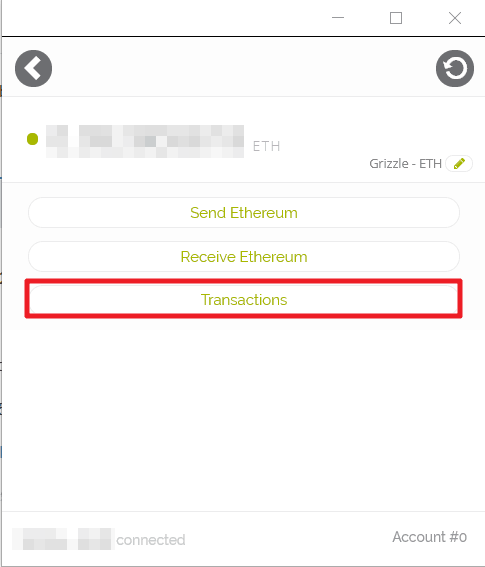
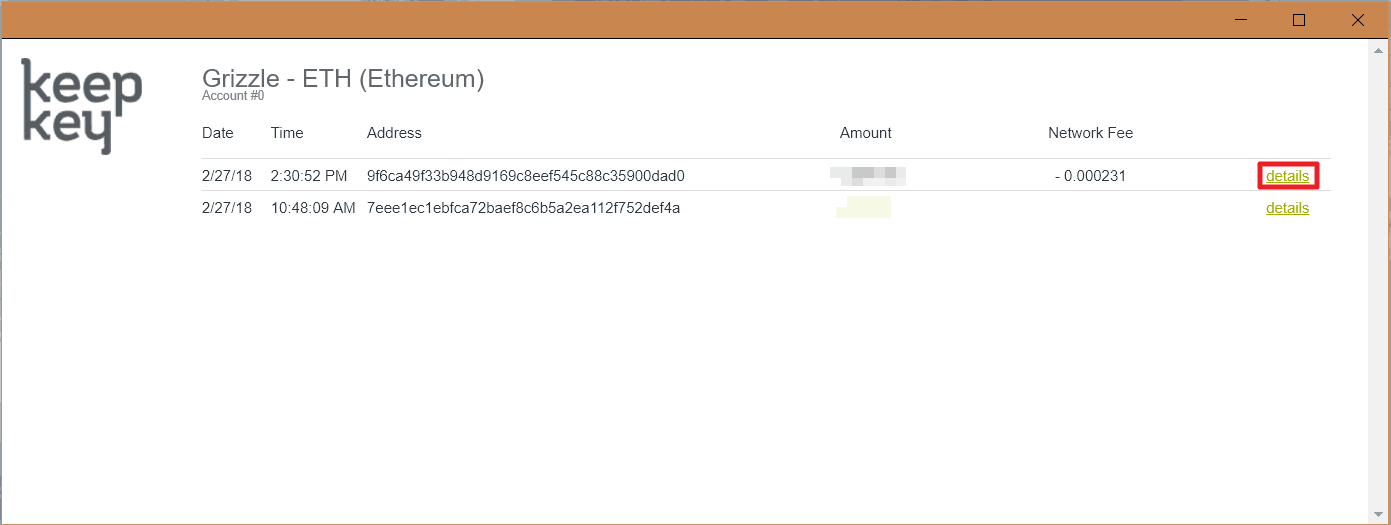
- Once the ETH has been sent, the transaction information can be seen by selecting the 'Transactions' button.
- Details of the transaction can be viewed by selecting the 'Details' link, which will open up the transaction in the Etherscan block explorer.
3. SENDING COINS
Sending Bitcoin
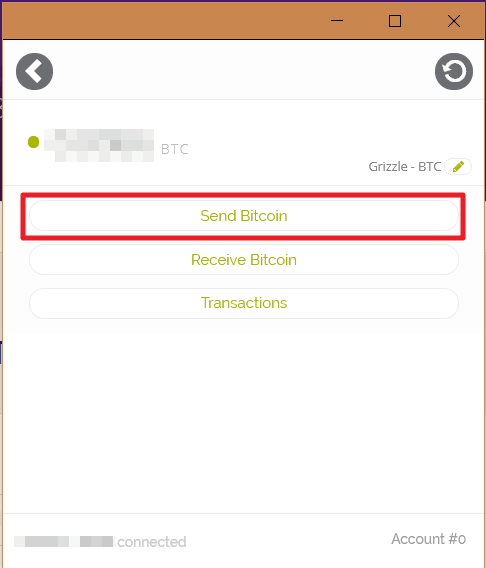
Sending Bitcoin (BTC) on the KeepKey is done through the Client App:
- Plug the device into a USB slot.
- Open the KeepKey Client App and unlock the KeepKey by entering the PIN.
- Select a Bitcoin account to receive the BTC or create a new account by clicking the “+” at the bottom-right.
- Select the 'Send Bitcoin' button.
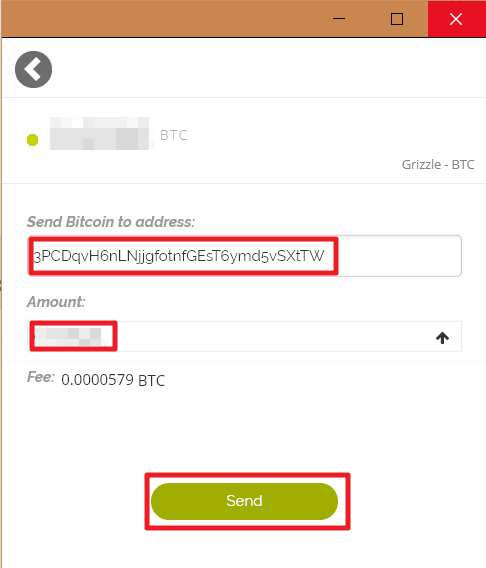
- Enter the address to send the BTC to in the 'Send Bitcoin to:' field (NOTE: selecting another account on your KeepKey from the drop-down in this field will send your BTC to that account and use Shapeshift to exchange the BTC for the other coin if it is not BTC).
- Enter the amount of BTC to send (select the upwards arrow to empty the account) and select 'Send'.
- The KeepKey will require the PIN for the device to be re-entered.
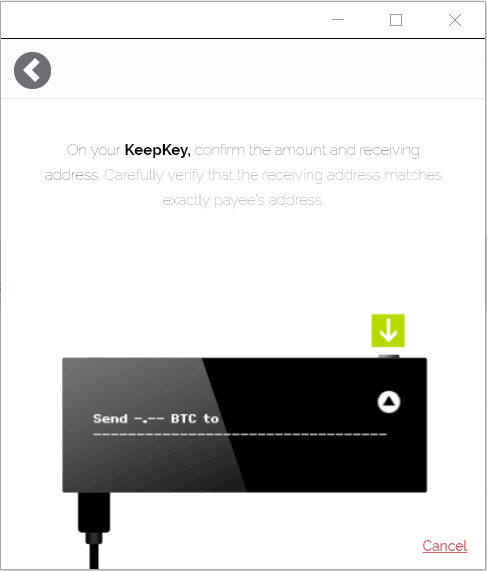
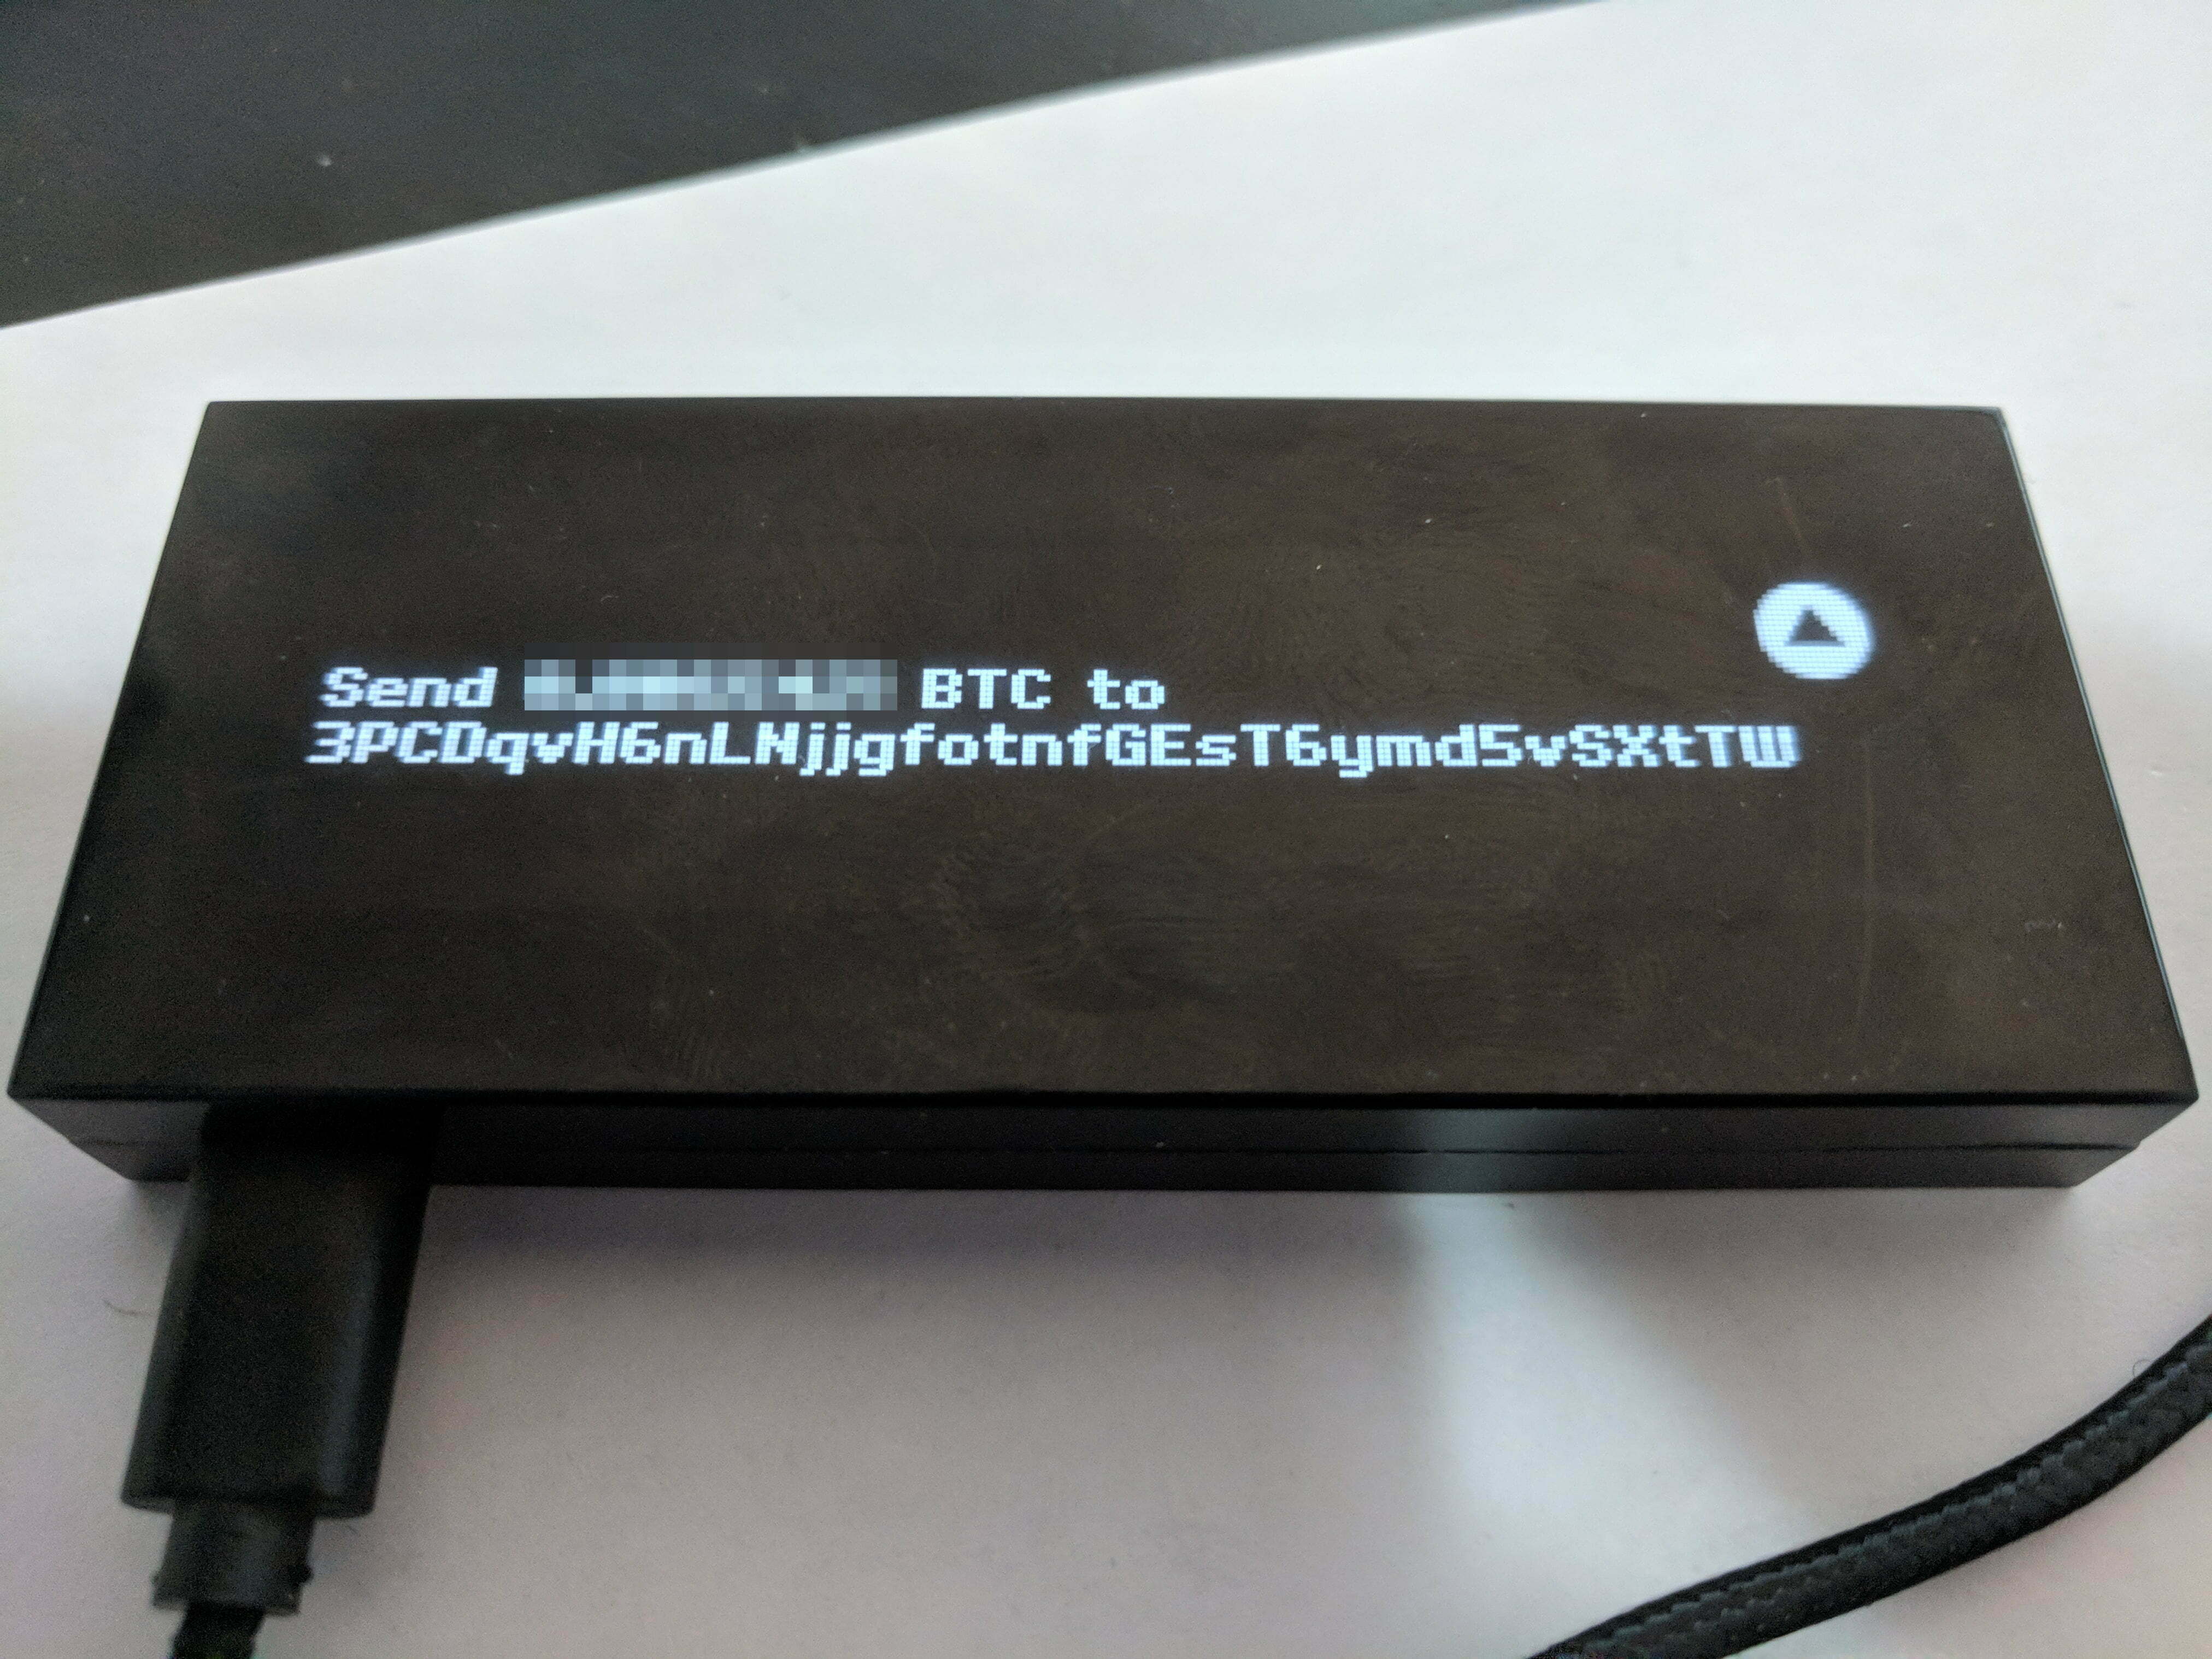
- The KeepKey will then display the amount and address to send the BTC on the device. Confirm all the details are correct then press and hold the button until the checkmark is displayed.
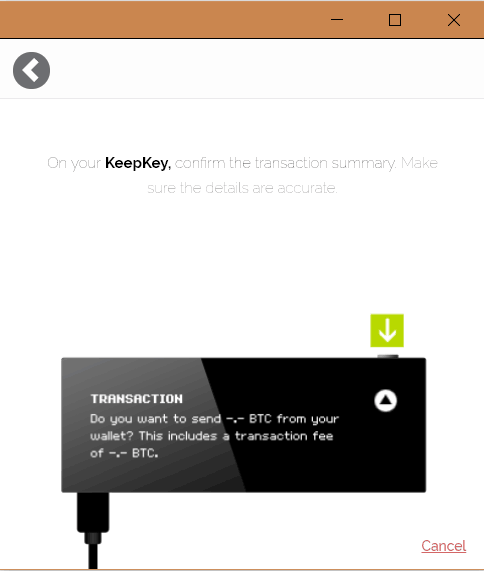
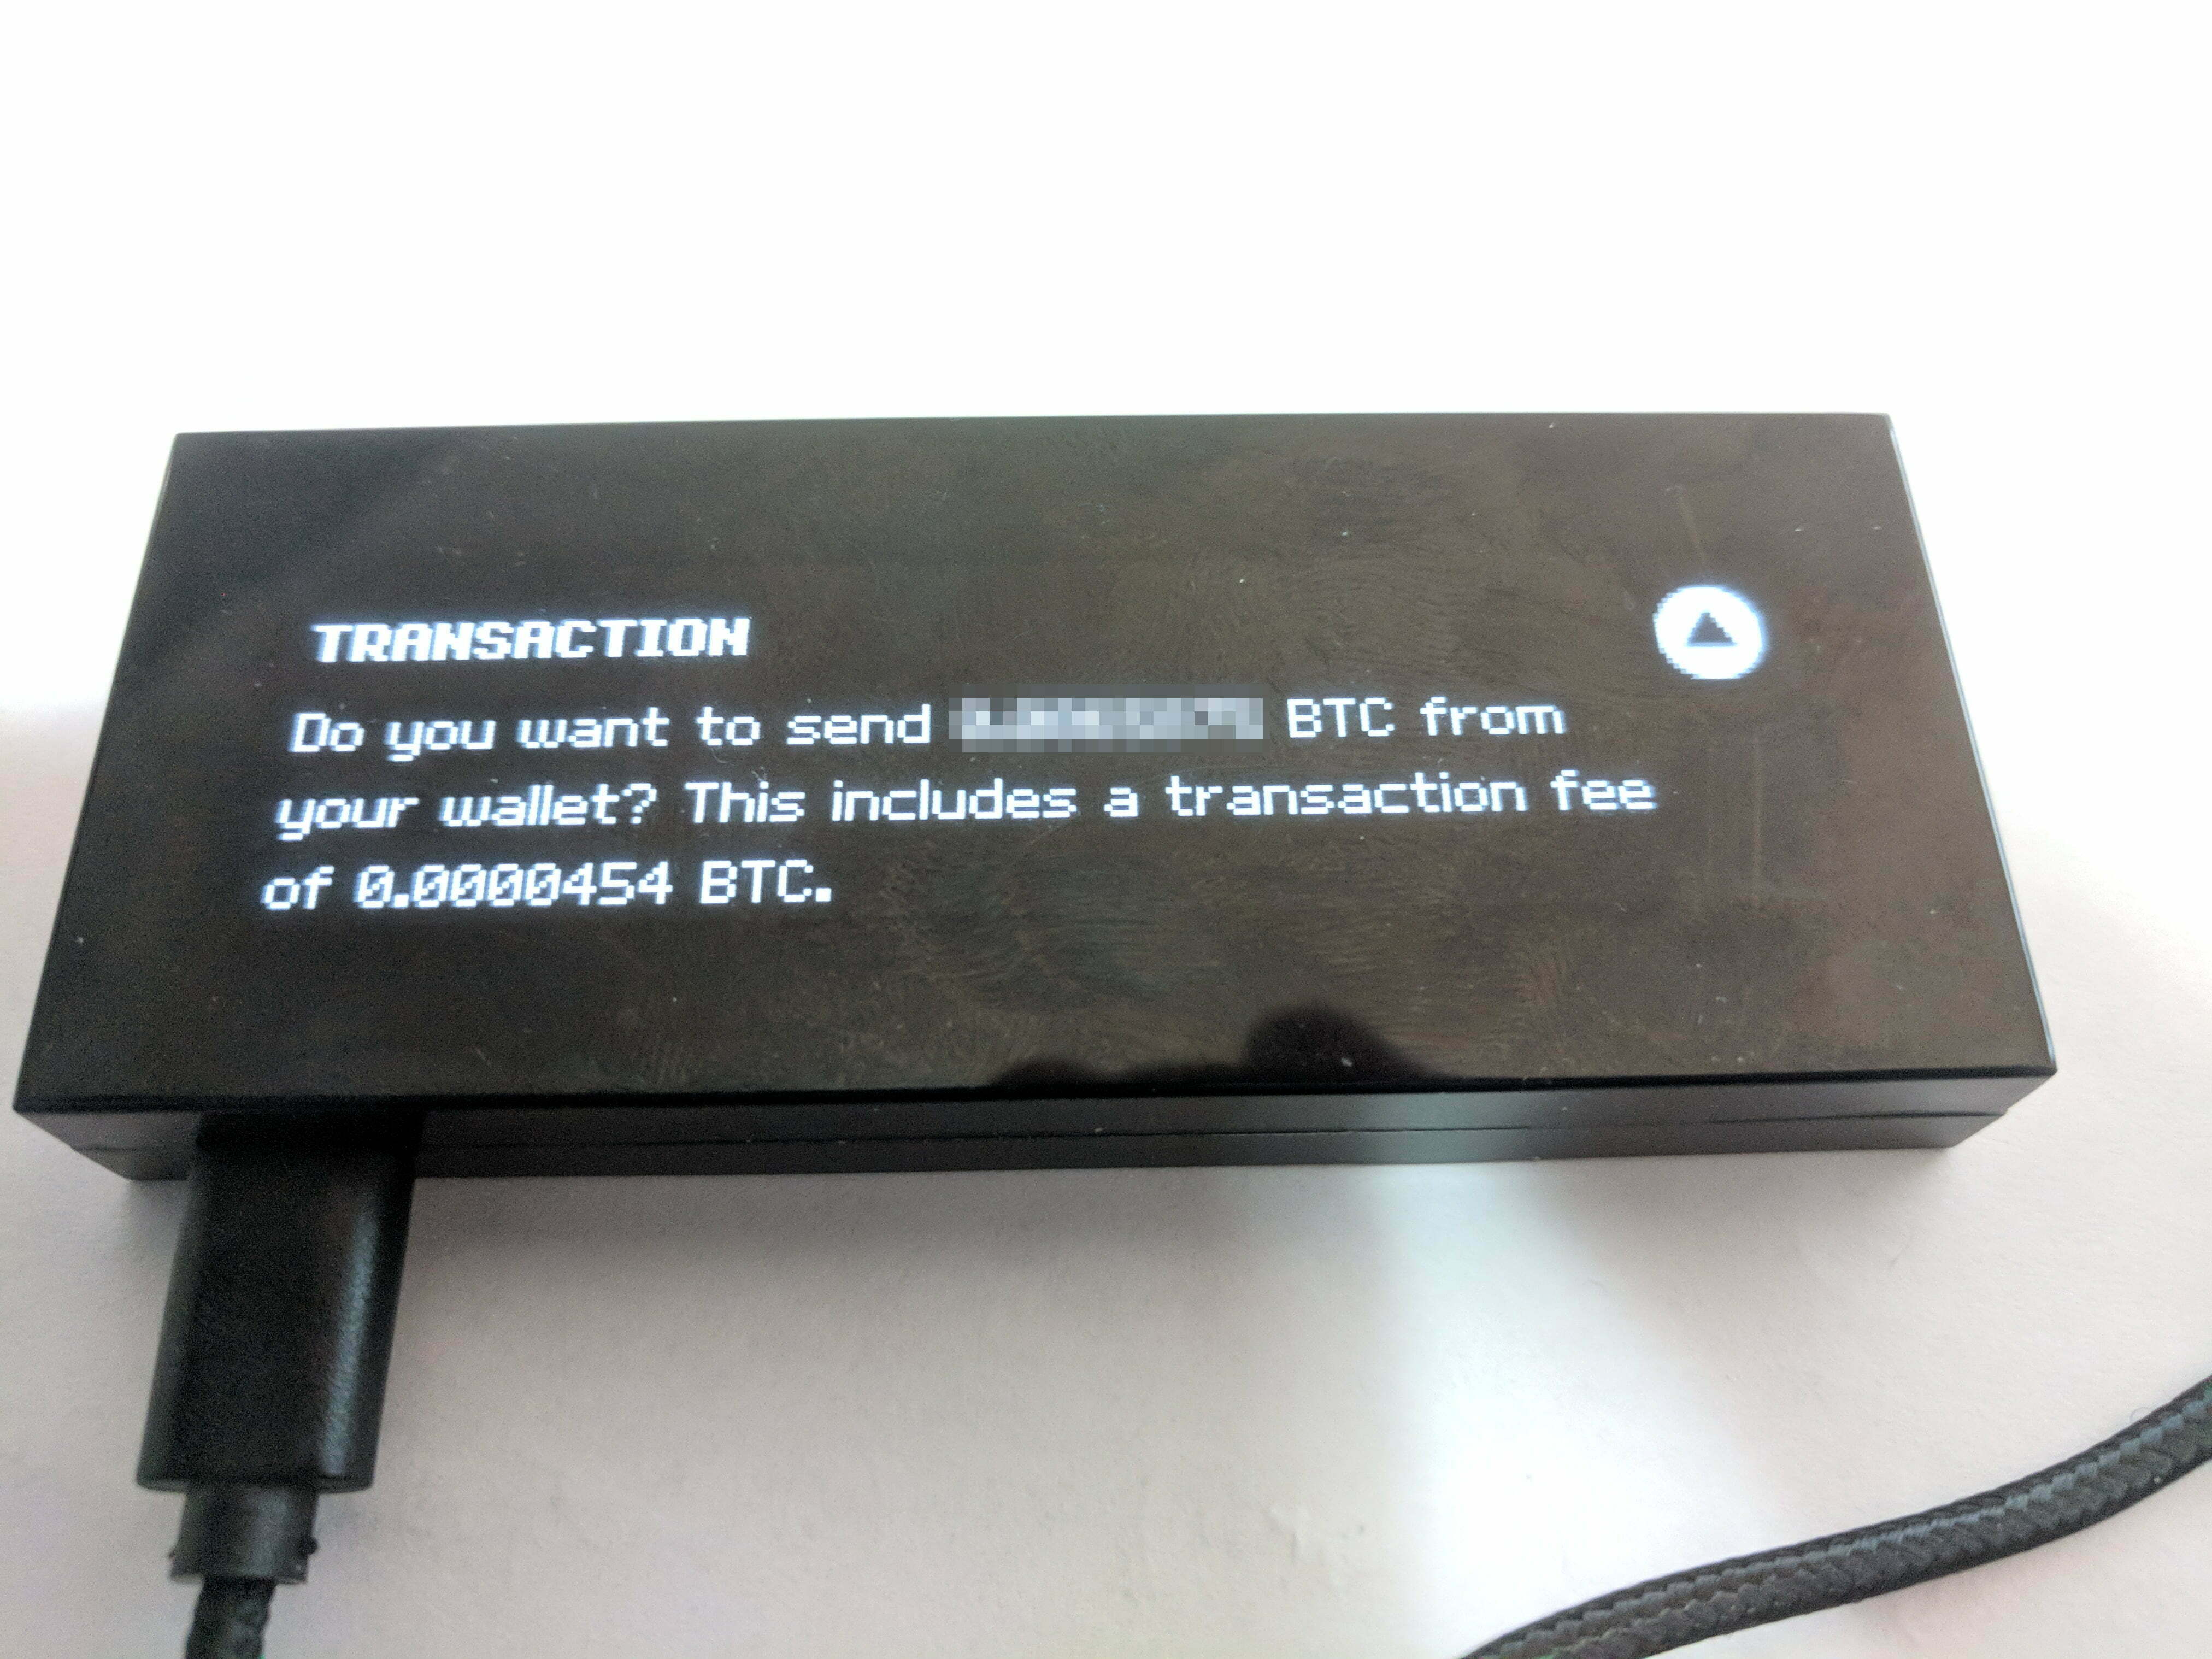
- The device will then display the transaction amount and fees. Confirm the details by pressing and holding the button until the checkmark is displayed.
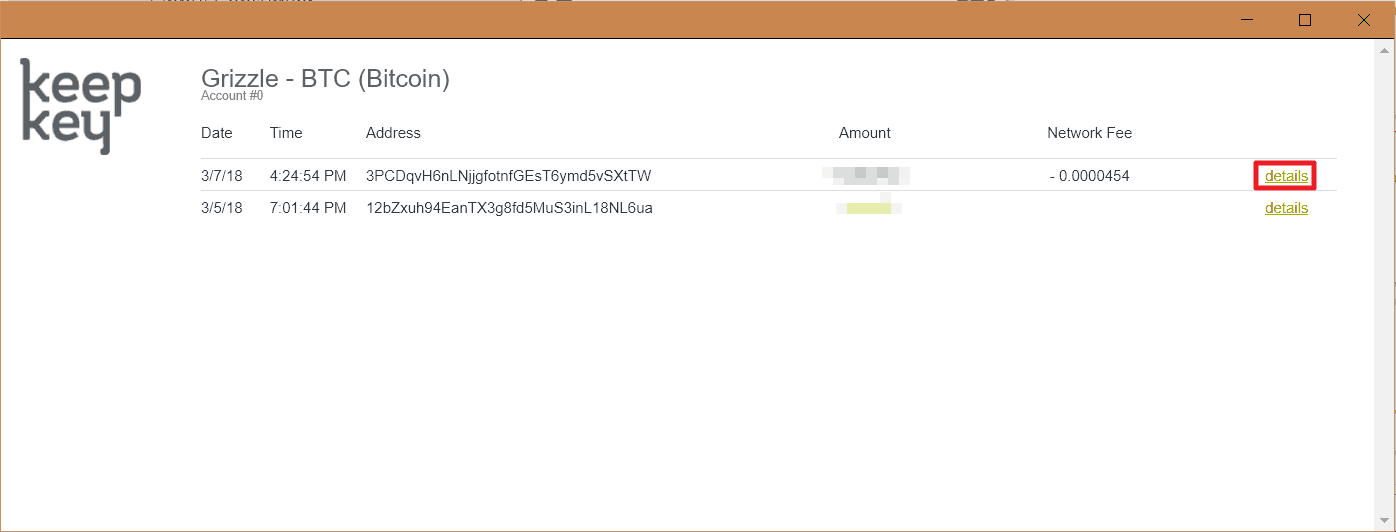
- The account balance will now be updated and the transaction can be viewed by selecting 'Transactions' from the account screen.
- Select 'details' to view the details of the transaction in the BlockCypher block explorer. (Note that it's standard to wait until 6 confirmations or about 1 hour to ensure the transaction has been processed correctly).
Sending Ethereum
Sending Ether (ETH) on the KeepKey is done through the Client App:
- Plug the device into a USB slot.
- Open the KeepKey Client App on and unlock the KeepKey by entering in the PIN.
- Select an Ether account to receive the ETH or create a new account by clicking on the '+' at the bottom-right.
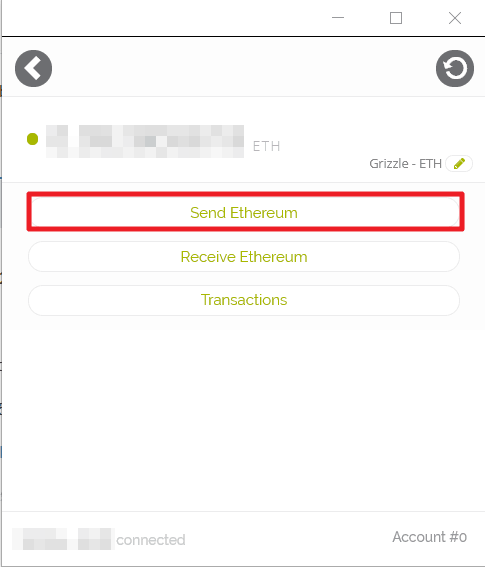
- Select the 'Send Ethereum' button.
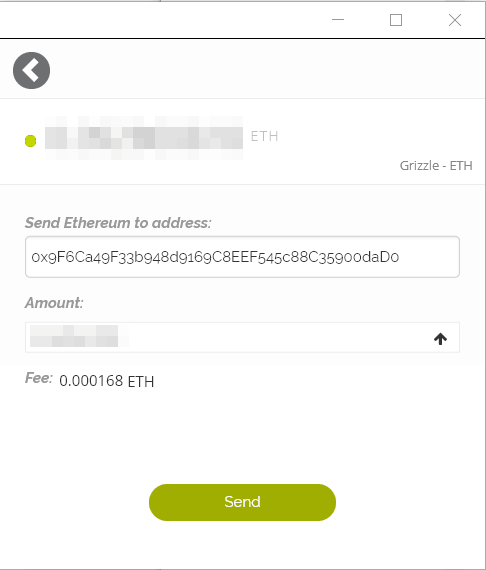
- Enter the address to send the ETH to in the 'Send Ether to:' field.
- Enter the amount of ETH to send (select the upwards arrow to empty the account) and select 'Send'.
NOTE: Selecting another account on your KeepKey from the drop-down in this field will send your ETH to that account and use Shapeshift to exchange the ETH for the other coin if it's not ETH.
TIP: Do not include the leading “0x” in the address.
- KeepKey will require the PIN for the device to be re-entered.
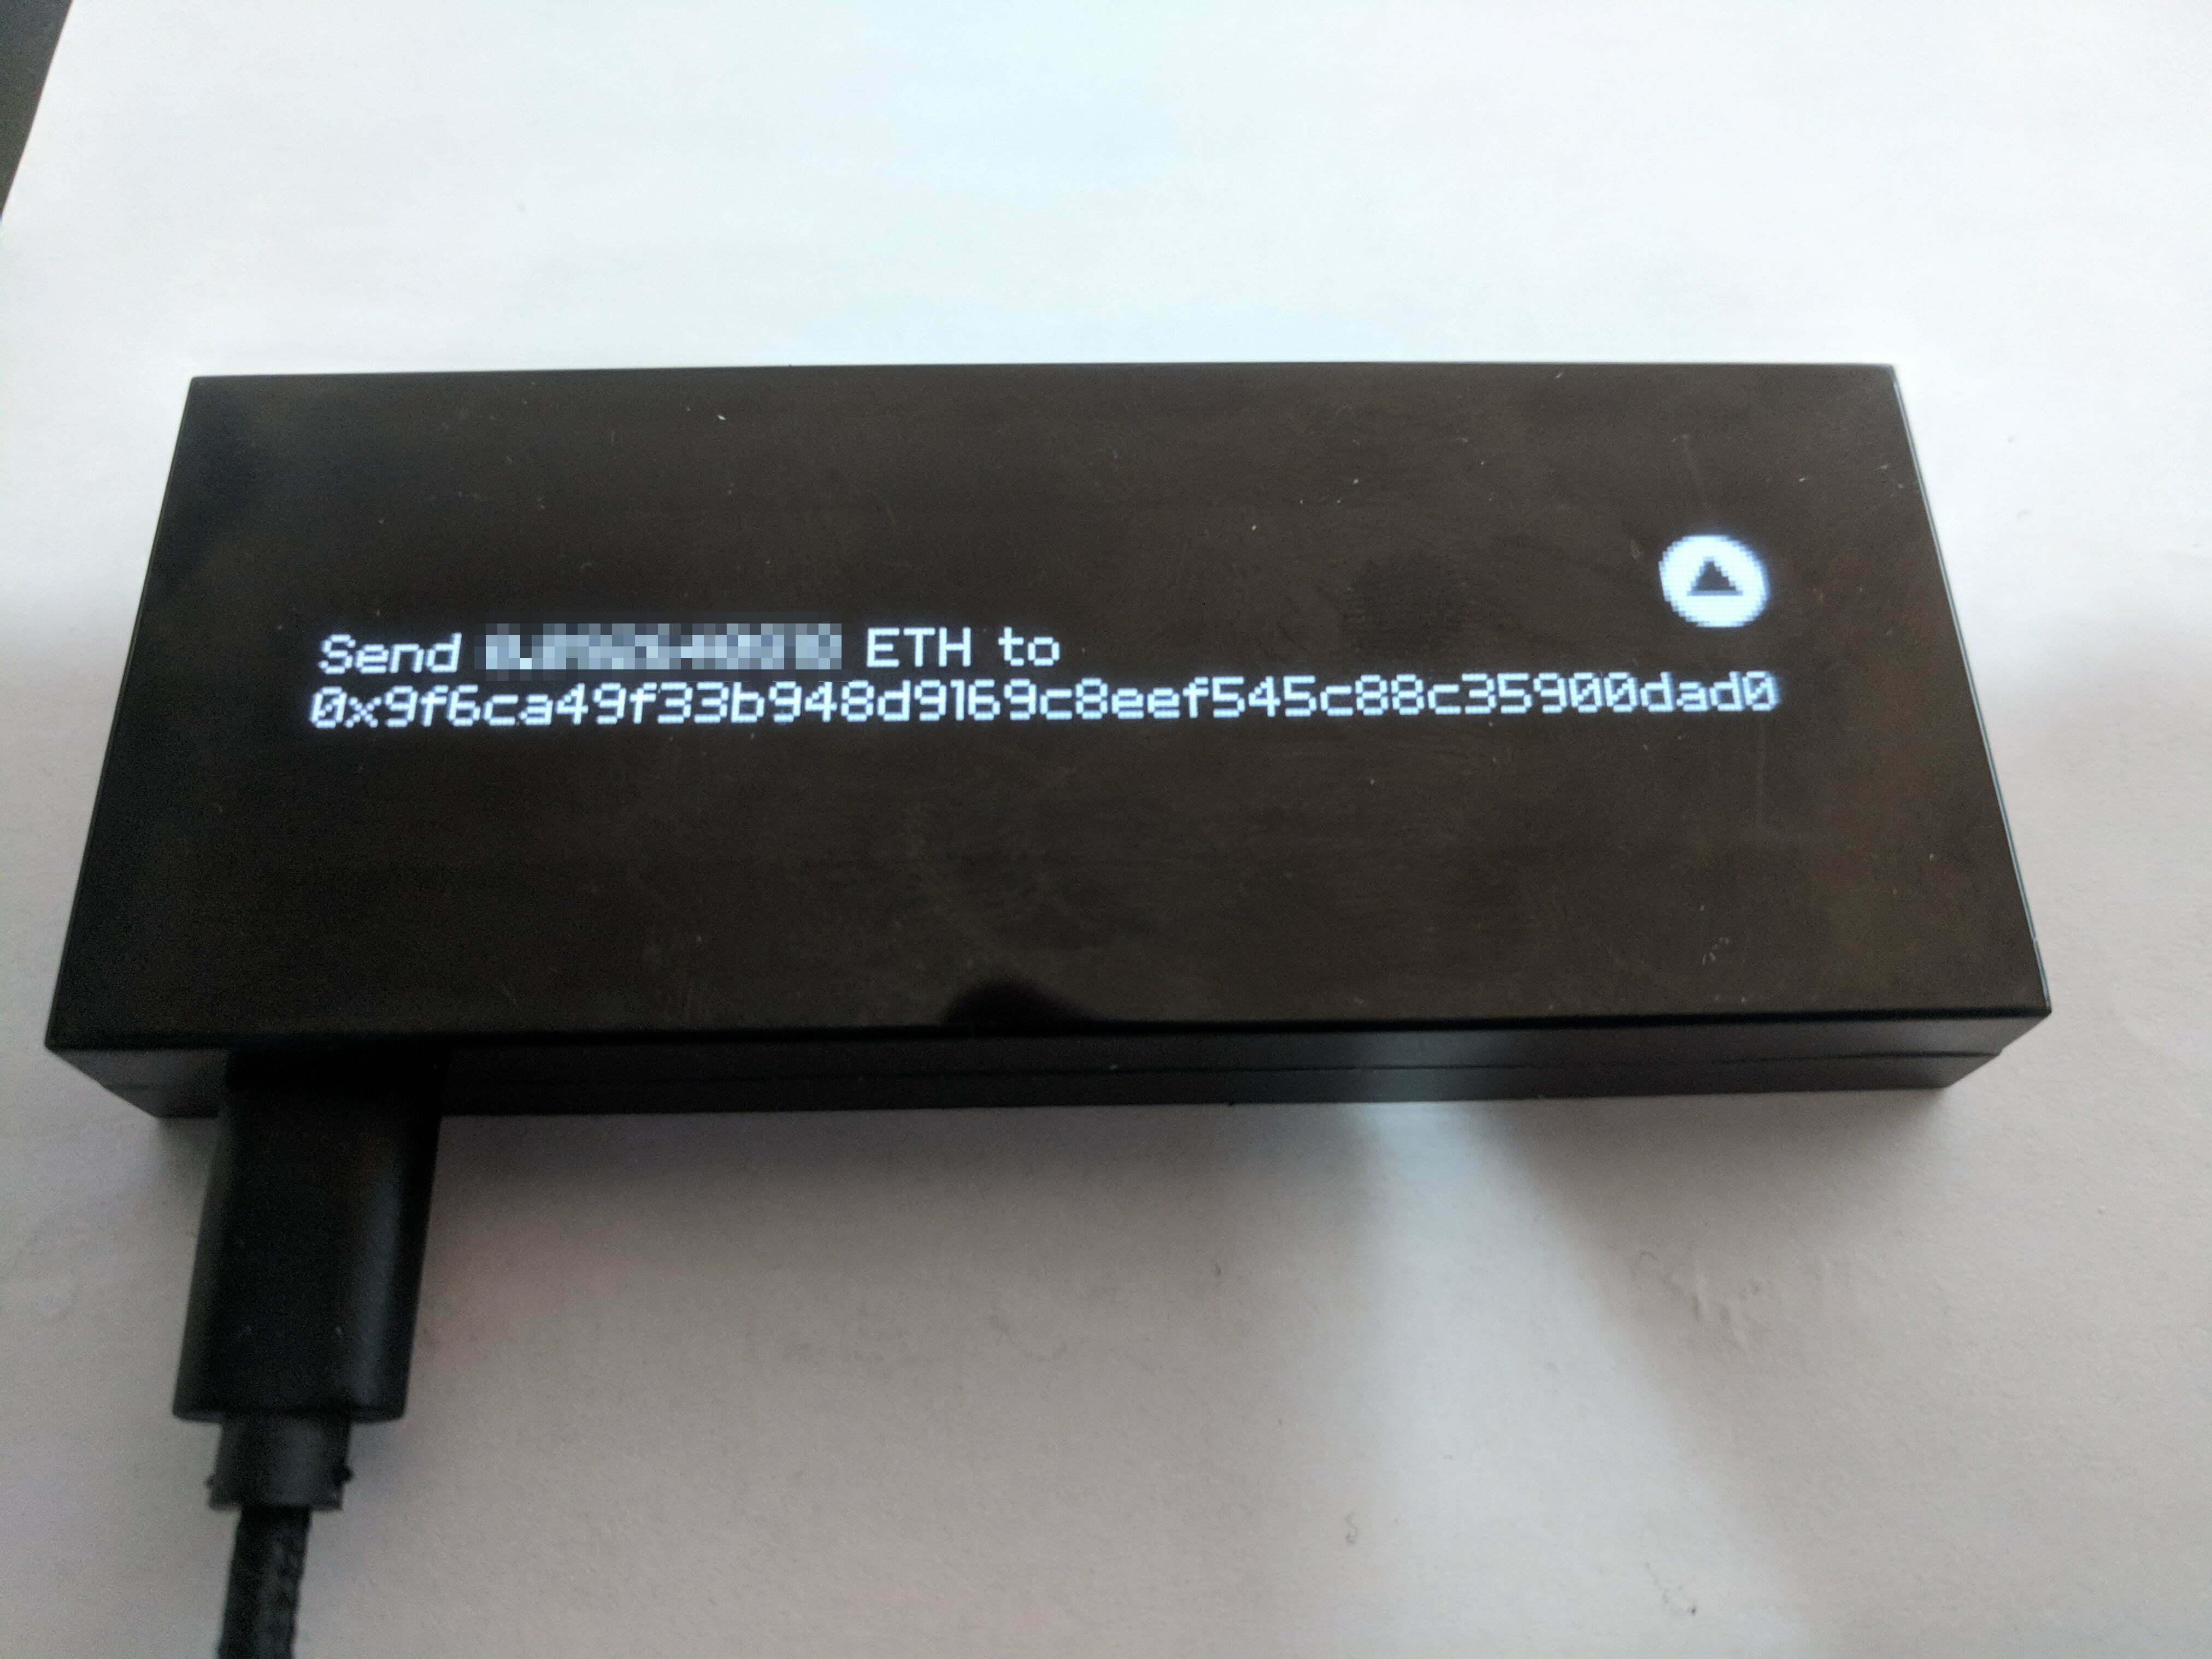
- The device will then display the amount and address to send the ETH. Confirm all the details are correct then press and hold the button until the checkmark is displayed.
- The KeepKey will then display the transaction amount and fees on the device. Confirm the details by pressing and holding the button until the checkmark is displayed.
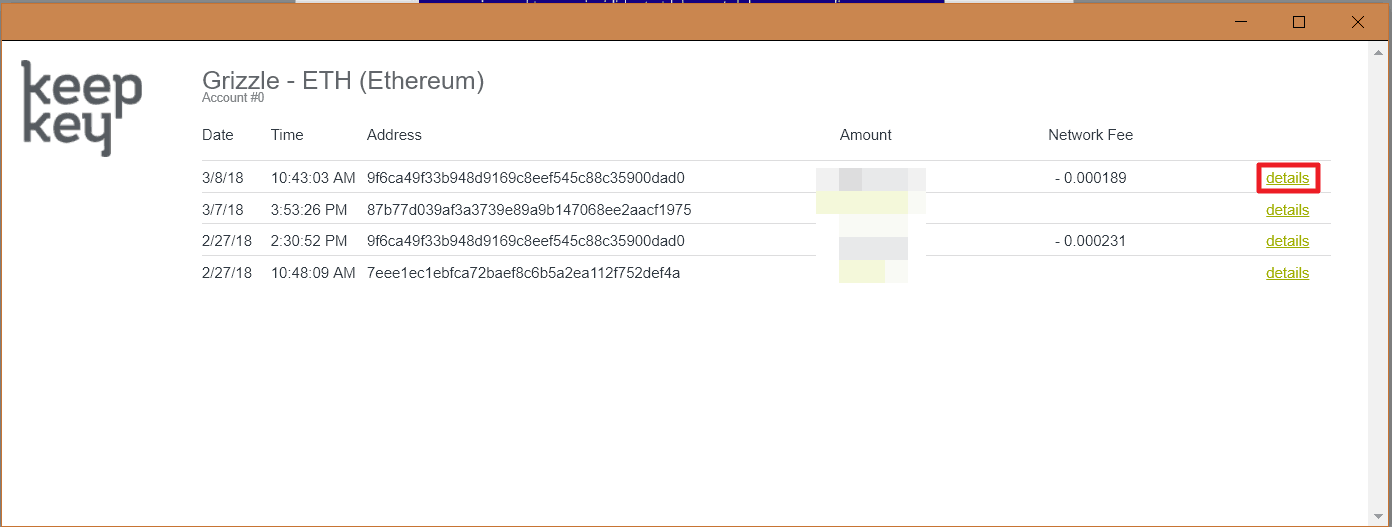
- The account balance will now be updated, and the transaction can be viewed by selecting 'Transactions' from the account screen.
- Select 'details' to view the details of the transaction in the Etherscan block explorer.
4. BACKUP & RECOVERY
The backup of the KeepKey is performed at the time of setup and is stored on the recovery sentence card. This card should be kept in a private, secure location, separate from the KeepKey itself.
Restoring the KeepKey is done from the recovery sentence card. To recover the wallets on a new or wiped KeepKey:
- Plug the new or wiped KeepKey into a USB port.
- Open the KeepKey client app.
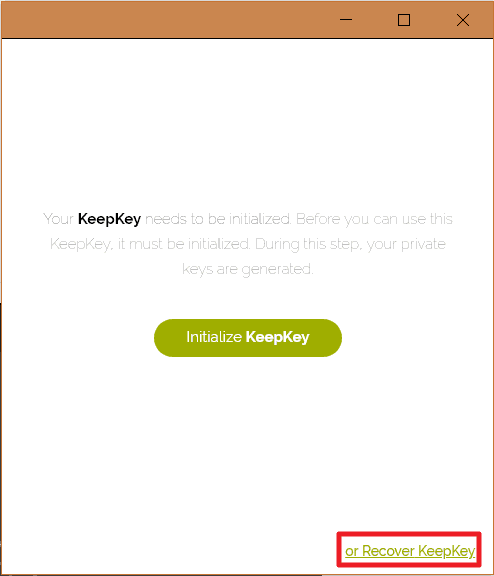
- Select 'or Recover KeepKey'.
- Follow the same steps as in the Setup to set a Label and PIN for the device.
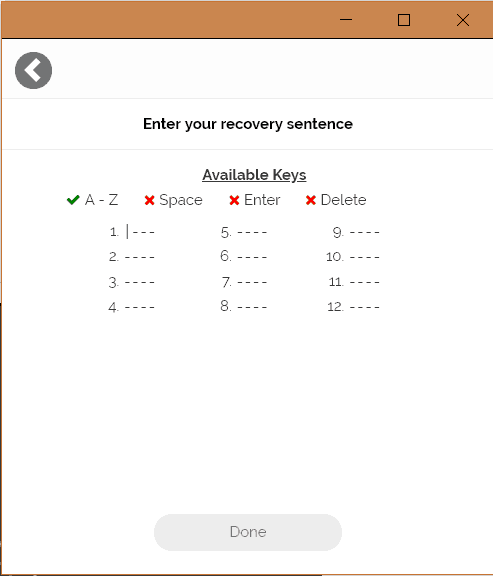
- Start to enter the words for the recovery sentence (written on the recovery sentence card) from the initial setup.
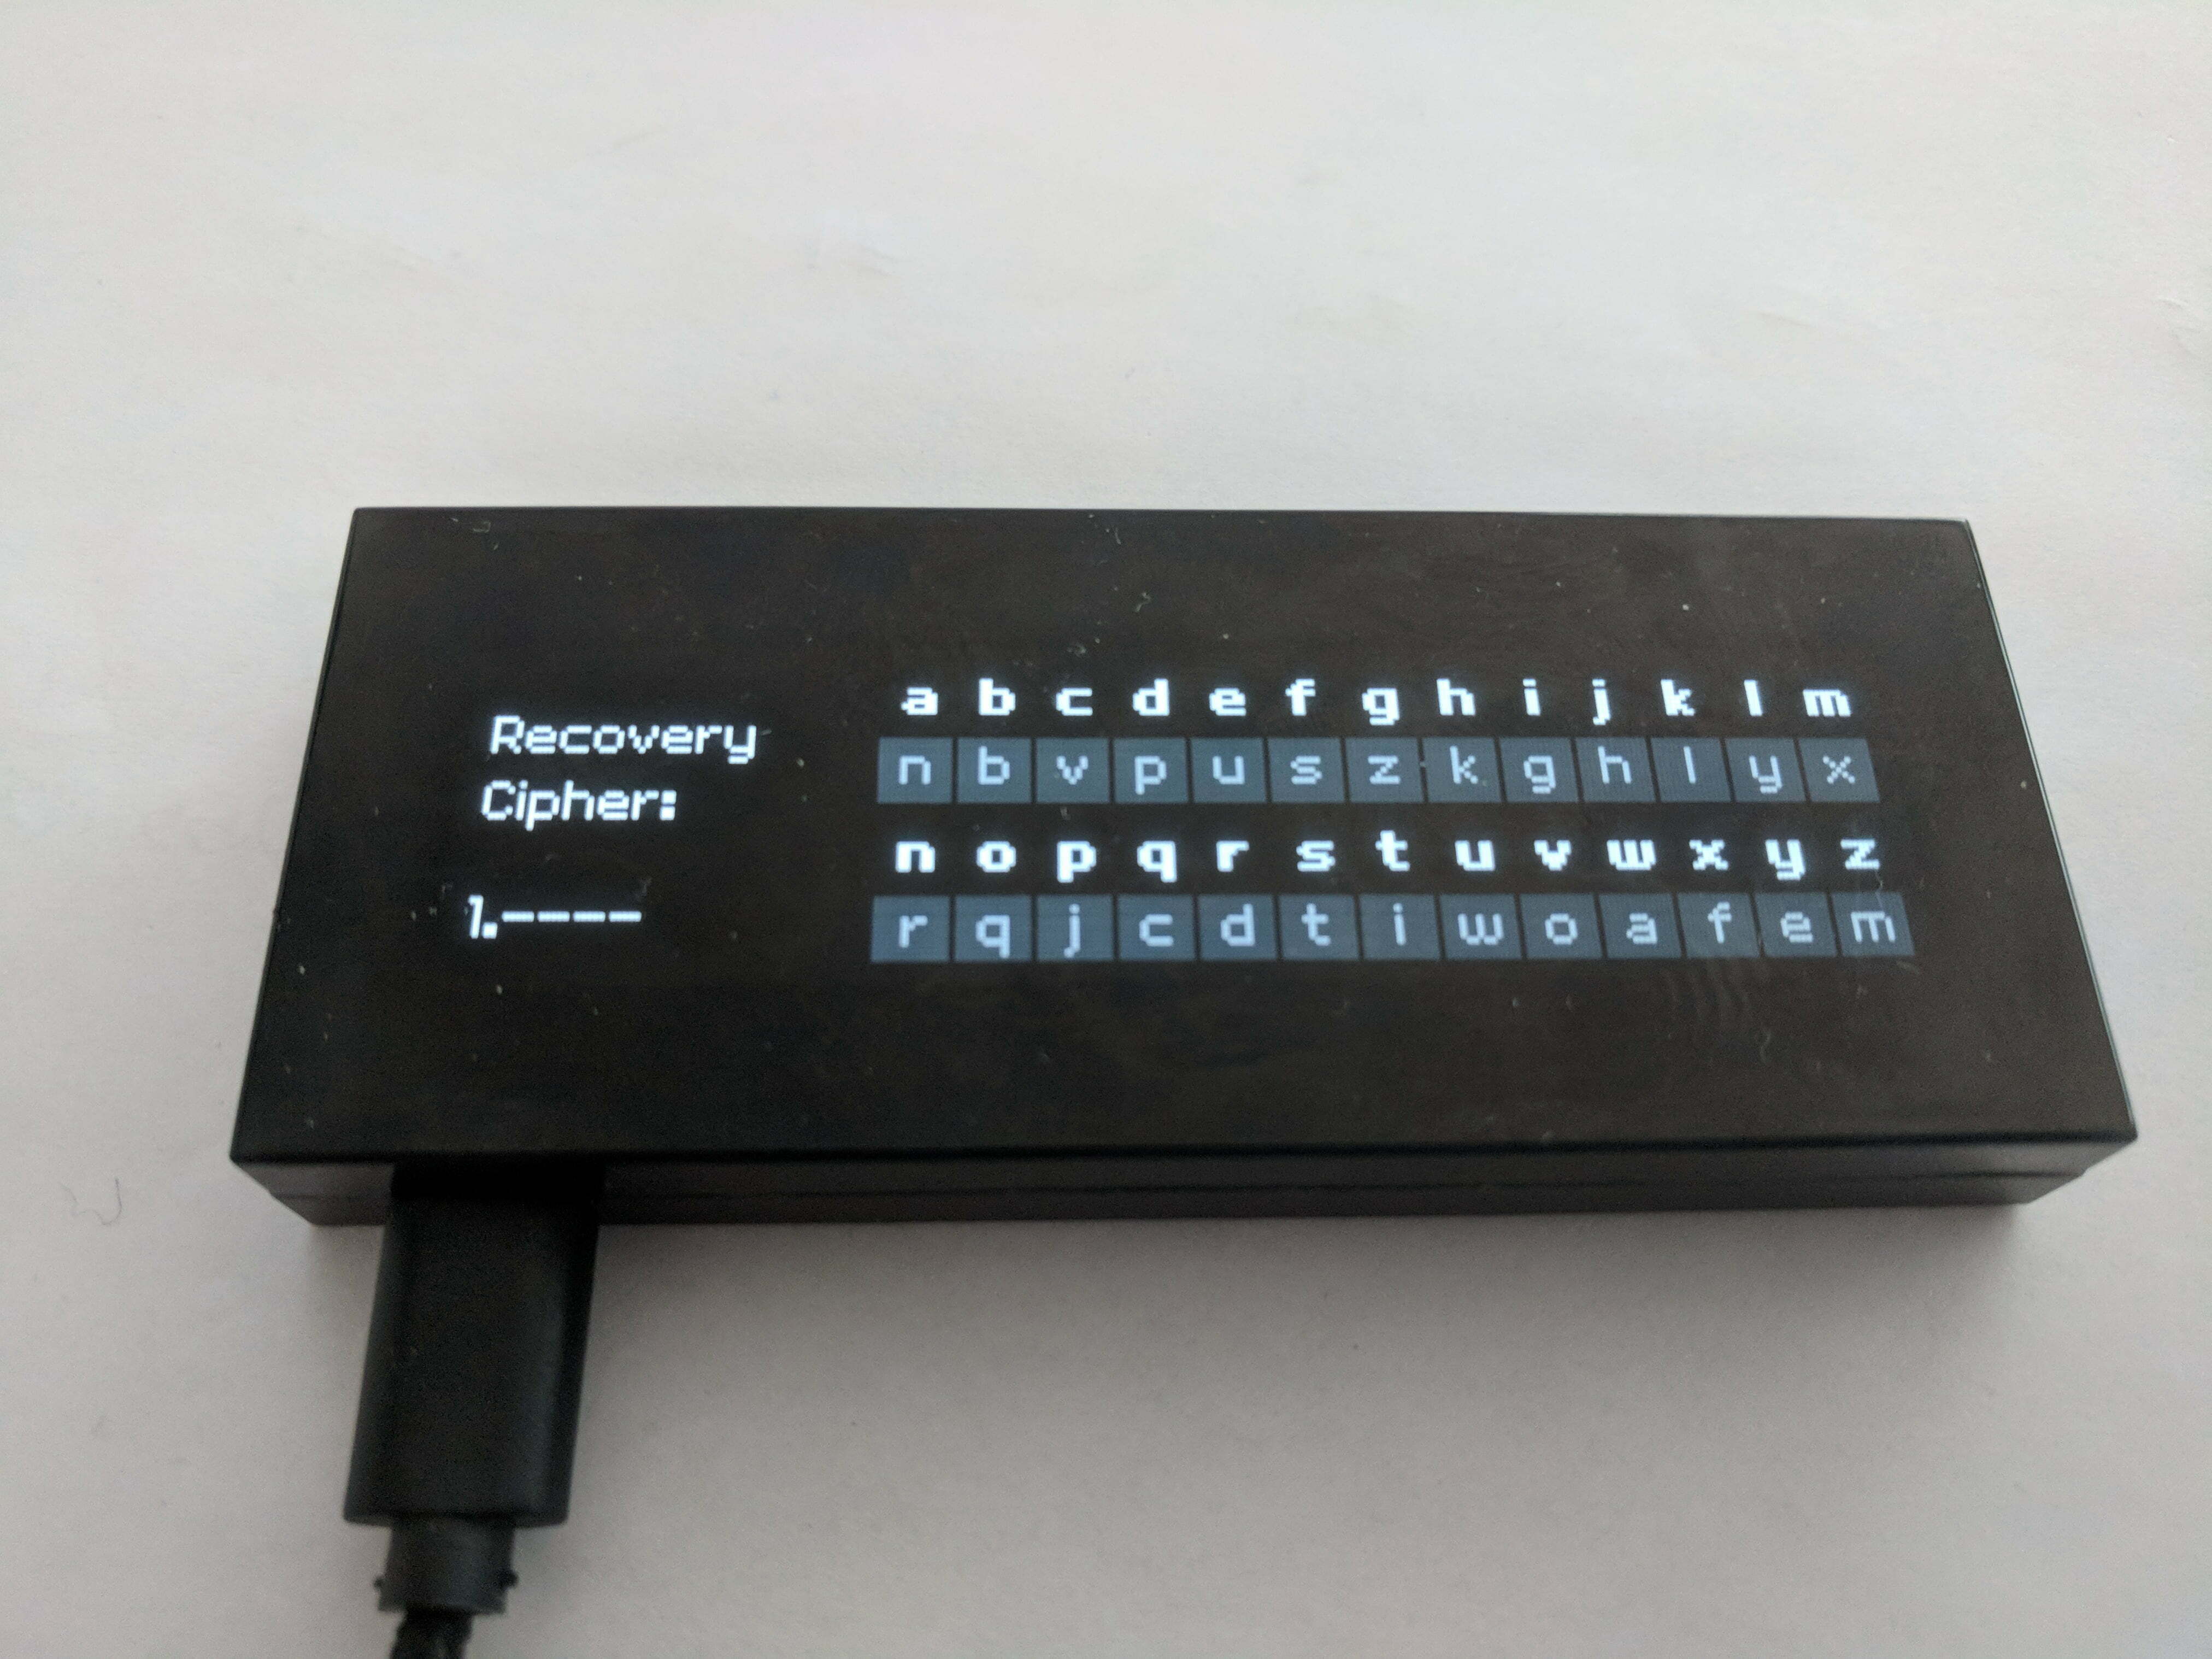
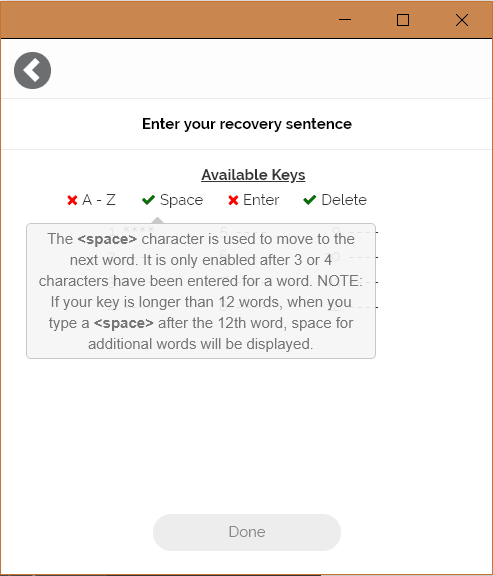
- This is done by typing the cipher letter UNDER the letter in the recovery word. For example, to enter the letter “d” type the letter “p”. Note that after each letter the cipher will be scrambled as an added security feature. The word will auto-complete after the 4th letter. Confirm the word on the device and the computer has a checkmark then press spacebar to move onto the next word.
- After entering all 12 words hit 'Enter' to complete the recovery process.
- All the accounts and history of transactions will now be recovered to the KeepKey.
* This link directs you to Amazon as it provides the most options for purchasing this wallet. However, it is important to note that when purchasing a hardware wallet through a third party retailer or vendor to always ensure that the wallet once received has not been tampered with as this could compromise its security and thus the cryptocurrency you will store on it. Each wallet manufacturer typically has tamper resistant packaging or other hardware/software mechanisms to prevent tampering but they are not foolproof. Please only purchase hardware wallets from trusted vendors.
Users should be aware that if they click on a cryptocurrency link and sign up for a product or service, we will be paid a referral fee. This in no way affects our recommendations, which products we choose to review or our advice which is the sole opinion of the authors.
The opinions provided in this article are those of the author and do not constitute investment advice. Readers should assume that the author and/or employees of Grizzle hold positions in the company or companies mentioned in the article. For more information, please see our Content Disclaimer.

